In this digital day and age, our mobile phones hold a breadth of information about our private lives. Of the mobile phones, Samsung is one of the leading brands, with billions of units sold worldwide every year.
It is a company that is especially known for its stable software and durability. But nowadays, almost everything can be found online. No matter how stable and durable a phone is, it is normal to want to protect our privacy from outsiders.
The Factory Reset Protection (FRP) or Google Account Verification works as a lock feature that protects your phone's data from getting access without your explicit permission.
It does this by asking you to sign in to your Google account before you can factory reset your phone.
This lock protection method was created for unfortunate events involving losing your device or having it stolen so that none of your information can be used against you.
That said, it is not without its faults and there will be times when you will need to bypass it on your Samsung device for whatever reason.
This can be done by employing a certain number of methods, which we will discuss in this article.
To bypass FRP lock on Samsung devices, people used to utilize multiple tools, enter Fastboot mode on the device, or use talkback. What if there is a single tool for Samsung FRP bypass?
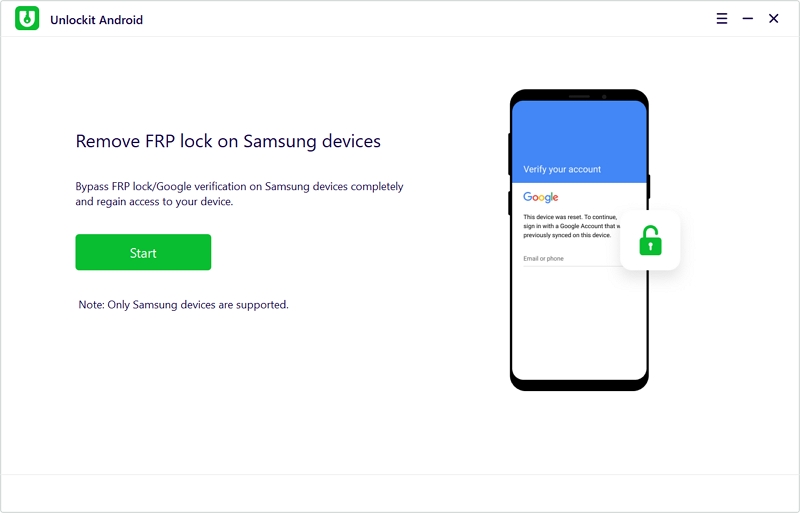
Here comes Unlockit Android as the first method. FRP bypass has been made more easier using this tool. It is an all-in-one program that can remove FRP locks for all common Samsung models in just 1 click.
After removing the FRP lock with Unlockit Android, you can add a new Google account and password on your device. Furthermore, it is compatible with most of Android devices running Android 6-12.
Unlockit Android will walk you through each step to remove the FRP lock quickly, even if you are not technically savvy.
To use Unlockit for Android, just do the following steps or watch the video instead:
Download and install Unlockit for Android on your computer.
Next, open it from your computer and click on Start. Then, connect your Samsung phone to your computer via a USB cable.
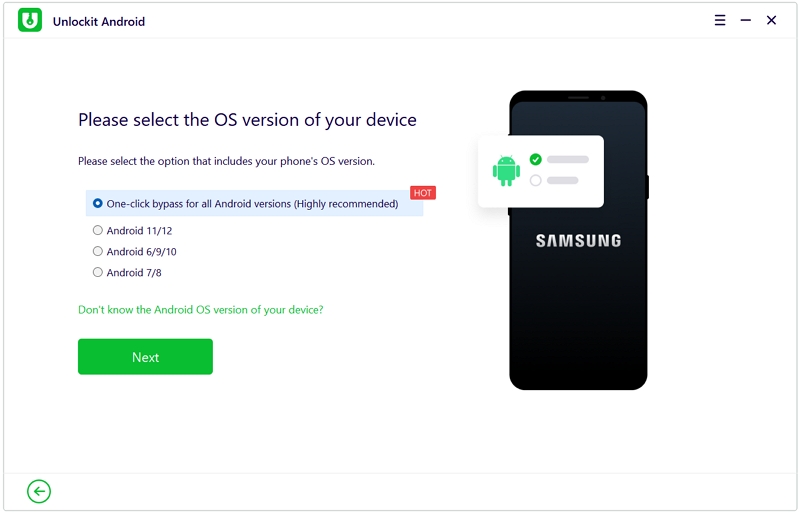
Then, select the All Android Versions from the list and click Next.
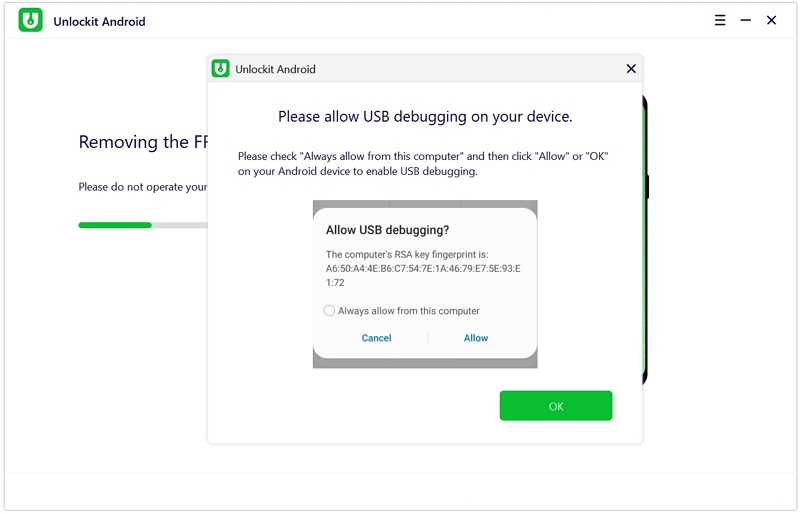
Following that, the software will start the removal. To set up the device, follow the necessary steps as shown in the interface.
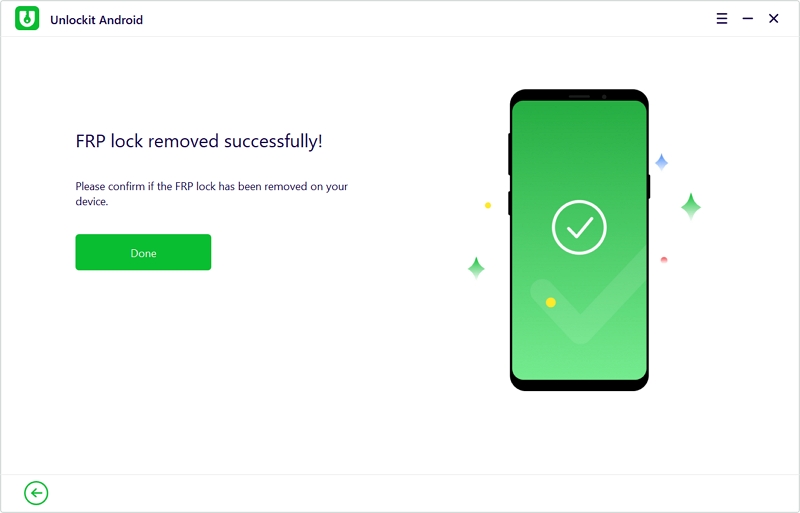
Once you've followed everything through, you will see "FRP lock is removed successfully!"
If you don't have a PC, you can also bypass FRP using talkback with just your smartphone. This process is a bit more tedious than the previous method, so make sure to follow the specific steps listed below.
This last method is the most basic way to bypass FRP Lock using just your device. Here's how to do it.
After doing a factory reset and choosing your language of choice, proceed by:
Keeping in mind that this is how to bypass Google Account Verification on a Samsung device, it may not work on other device brands.
If you purchased a used Samsung device, you can use this way to bypass Google FRP on Samsung online by logging out of the Google account associated with the device.
This will effectively remove the Google account from the Samsung A01 and bypass Google FRP online. However, this method only works if you can contact the previous owner and they are willing to help you.
To begin the process, follow these steps:
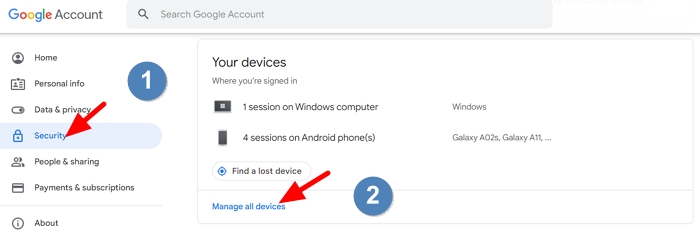
Step 1: Navigate to the website https://myaccount.google.com/ and enter the login credentials for the Google account that is linked to the Samsung A01.
Step 2: Once logged in, select the option "Security" and then find "Your Devices".
Step 3: From there, click on "Manage all devices " to proceed with the Samsung A01 FRP bypass online.
Step 4: Select the Samsung device that you would like to remove the FRP lock on.
Step 5: Click on the "Sign Out" option.
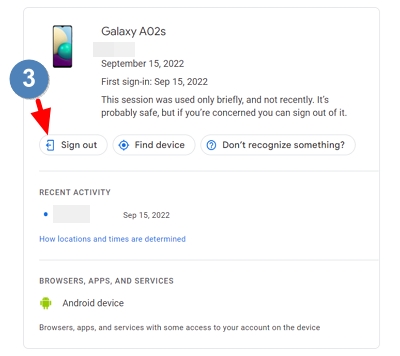
Step 6. Confirm your operation and the selected Samsung device will be removed from your Google account and therefore Google FRP will also be deactivated. It may take up to 28 days for the new status of the device to take effect.

As the details above suggest, there are many methods to bypass Factory Reset Protection on your Samsung device, but using Unlockit Android to bypass FRP on Samsung devices is much simpler and fast compared to the complex and long method of using TalkBack or Google Keyboard.
However, Unlockit Android does not come for free. Users may only use the free version to see if the software is compatible with their device.
To access all the amazing features of Unlockit, you must have the premium version. Unlockit Android offers yearly, monthly, and lifetime plans for $29.95, $39.95, and $49.95, respectively.
Having said all of this, Unlockit is still worth it for its price because, without a doubt, it is one of the greatest Android unlocker tools on the market.
You can rely on Unlockit to resolve a variety of Android lock problems. It is safe, quick, and effective in unlocking your Android in just a few minutes.
Plus, the user interface is simple and straightforward and supports various Android devices.


Mako is a technical writer with a passion for all things tech. Whether you're wondering about how to fix your iPhone or Android device or trying to get something to work in your settings, Mako is your go-to for professional help. He loves writing, testing solutions, and most of all, making sure his research is factually accurate.