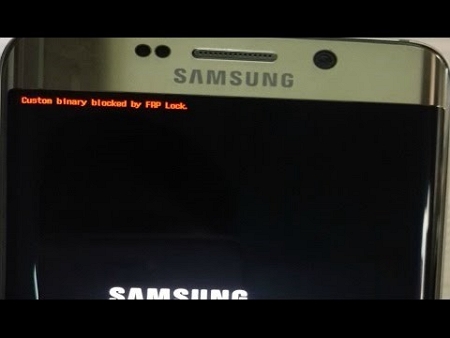
Getting an error message like "Custom Binary Blocked by FRP Lock" when you've been tinkering with your Android phone's system, like its firmware can be frustrating. But don't worry, we've got your back! In this guide, you'll learn more about this error message and some useful methods to bypass it.
FRP, or Factory Reset Protection, is a security feature introduced in Android 5.1 to safeguard your phone from unauthorized access or software changes. The FRP lock triggers on your device automatically when you perform a factory reset without logging out of your Google account.
If you attempt to root your device, modify critical settings, or install unauthorized software without first removing your Google account, FRP detects these actions and prevents the device from starting up. The "Custom Binary Blocked by FRP Lock" error message will pop up and prevent you from proceeding further.
To bypass this error on your Android phone, you'll need to revert your device to the stock firmware and then unlock the FRP lock using the methods below.
To bypass the "Custom Binary Blocked by FRP Lock" error, you'll need to first revert to the stock firmware on your device. For example, if your device is currently running Android 7.x Nougat but the stock firmware is Android 6.x Marshmallow, you'll need to flash back to Android 6.x Marshmallow.
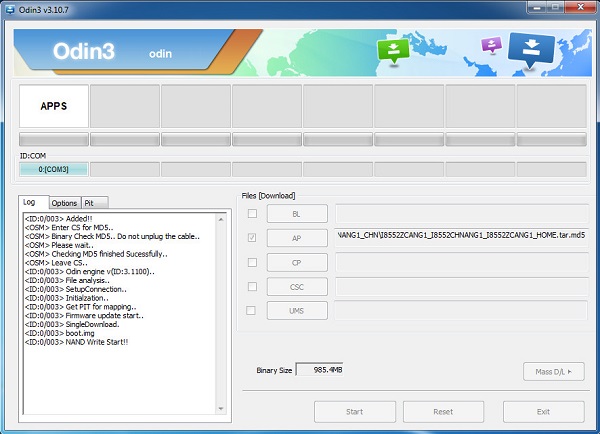
In this situation, you can use Odin software to help you revert to the stock firmware. Odin is Samsung software that can assist you in flashing stock firmware, making modifications, updating, restoring your device, and unbricking Galaxy devices.
Note: It's important to be sure to read the entire guide carefully before proceeding. We cannot be held responsible for any damage your device may incur. Proceed at your own risk.
To use Odin to flash the firmware on your Samsung, you'll need:
Here's how to flash the Samsung firmware update using Odin:
Remember, be careful and follow the instructions closely to avoid any errors or problems during the process.
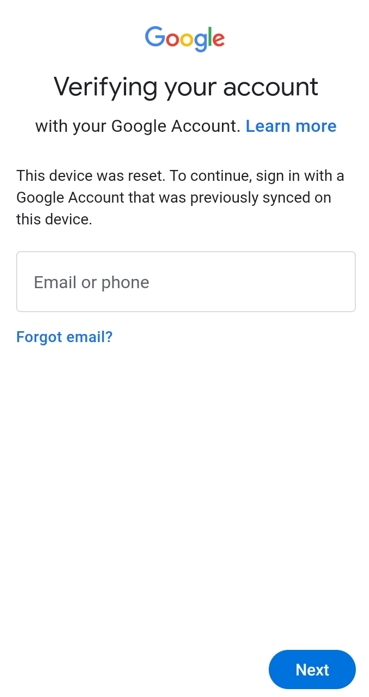
After your device reboots from flashing the firmware using Odin, it's time to enter the correct Google account ID and password on the FRP screen to access your device. If you can't recall the Google account details, you can jump to the next part to bypass the FRP lock on your device.
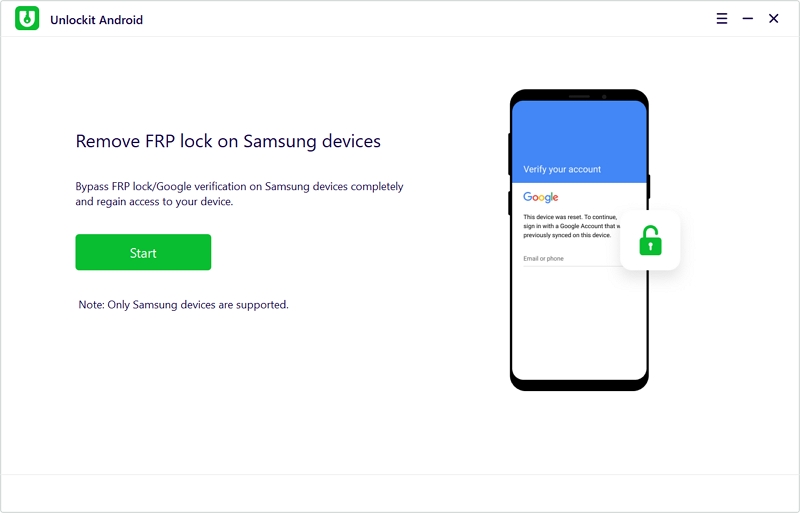
If you've forgotten your Google account details or if you've purchased a second-hand device that's synced with an unknown Google account, we have a solution for you. In this situation, you can use an FRP bypass tool like Unlockit Android to remove the FRP lock in about 5 minutes and regain access to your device.
Unlockit Android has a user-friendly interface and is completely safe. It supports all Samsung devices and Android OS versions from Android 6 to 12.
To bypass the FRP lock on your Android smartphone using Unlockit Android, follow these steps:
Step 1: Download and install Unlockit Android on your PC. Then, use a USB cord to connect your phone to your computer.
Step 2: Open Unlockit Android and click on Start to proceed.
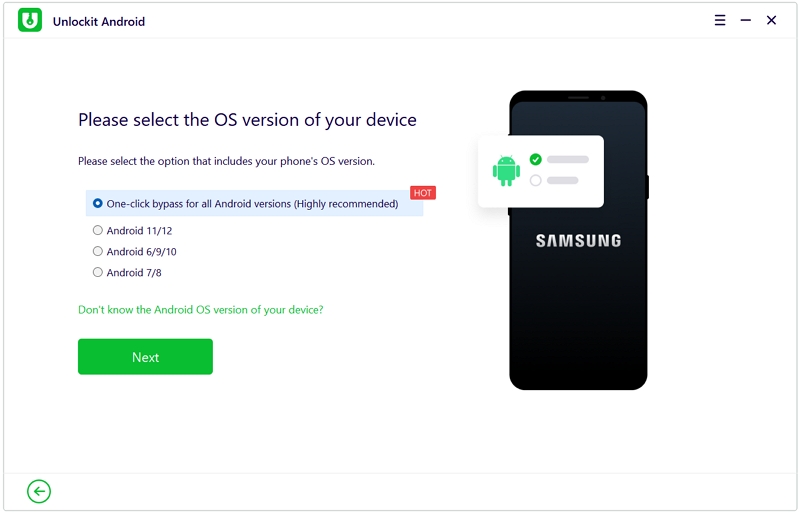
Step 3: Select the OS version of your Android device if you know it precisely. If not, you can select One-Click Bypass for All Android Versions for a general approach. Then click on the Next button to continue.
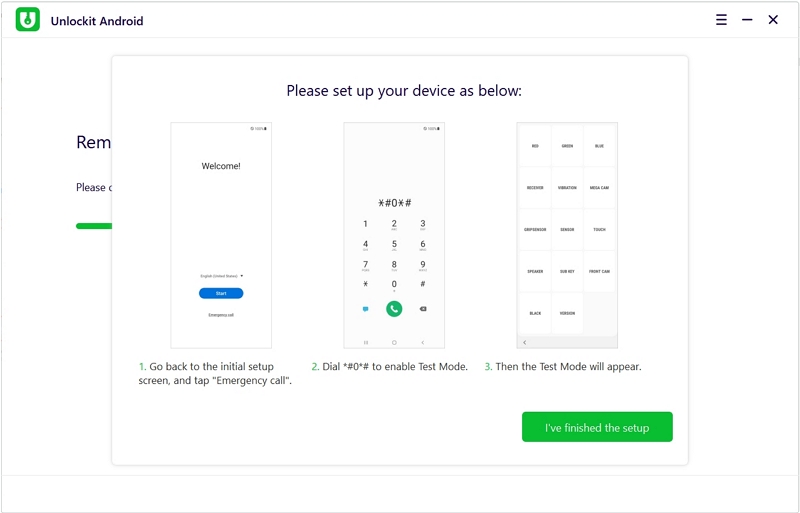
Step 4: Follow the on-screen instructions to enter test mode on your device.
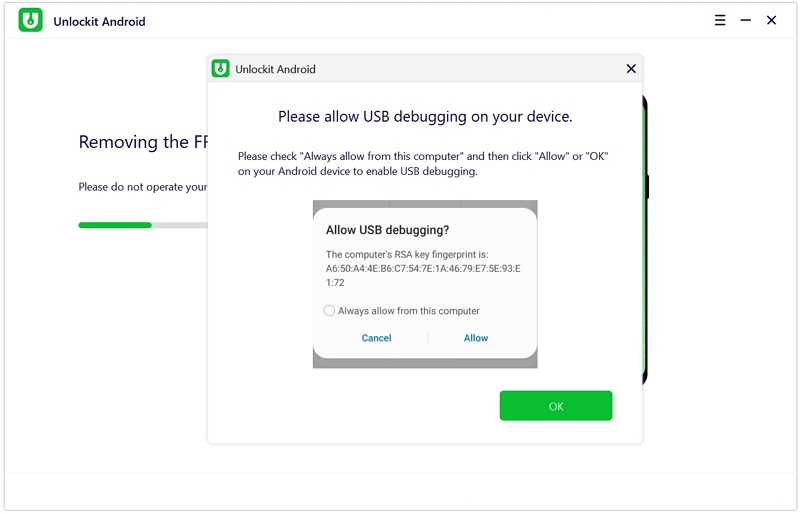
Step 5: Wait for a USB debugging prompt to appear. On your phone, check the option Always allow from this computer.
Once everything is set on your phone, go back to your computer and wait for the unlocking process to complete.
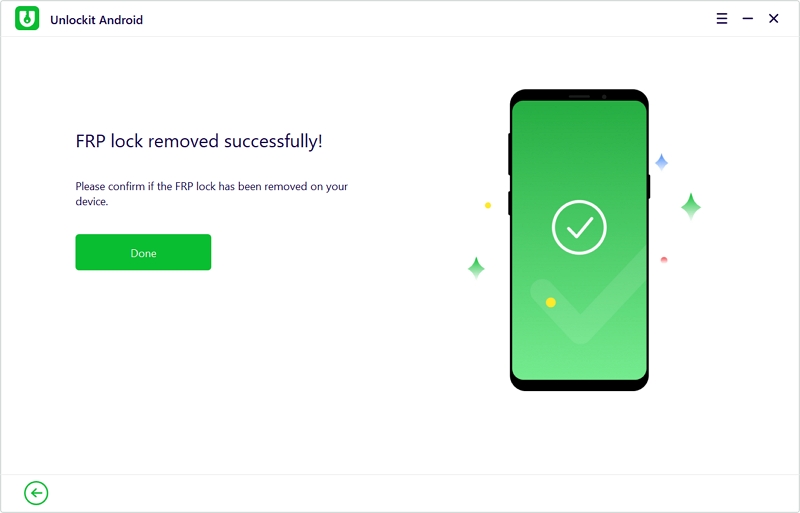
After the unlocking, your device will restart on its own. Unlockit Android will inform you that you have bypassed the FRP lock. Now, the device has bypassed the Custom Binary Blocked by FRP lock error, and you can customize your settings to your preference and begin using your phone without the error.
Google Talkback is an Android accessibility tool designed to assist individuals who are blind or visually impaired in interacting with their devices. You can also use Talkback to remove the FRP lock on your phone by following these steps:
And there you have it, after a few configurations, the FRP lock on your phone should now be removed.
By understanding the root cause of the Custom Binary Blocked by FRP lock error and using the appropriate solutions outlined in this guide, users can effectively resolve the issue and regain access to their devices.
We hope that the information provided here has helped you successfully unlock your smartphone when the Custom Binary Blocked by FRP lock pops up on it.


Mako is a technical writer with a passion for all things tech. Whether you're wondering about how to fix your iPhone or Android device or trying to get something to work in your settings, Mako is your go-to for professional help. He loves writing, testing solutions, and most of all, making sure his research is factually accurate.