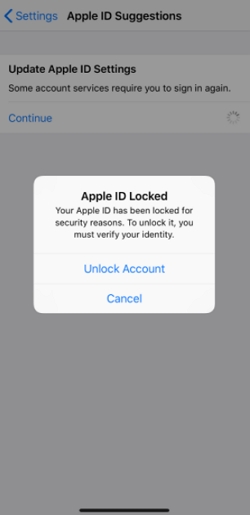
Did your Apple device display the message "Apple ID Locked. Your Apple ID has been locked for security reasons"?
The advice and specifics listed below can help you with your concern regarding Apple ID being locked for security reasons.
Before digging in, let us explain why a message like that appeared in the first place.
The leading causes of your Apple ID being locked or disabled are as follows:
If this happens, Apple locks your Apple ID automatically for security reasons and one of the following messages might appear:
So, if your Apple ID got locked for security reasons, read below to learn the different ways to unlock it.
Note: If your Apple ID got locked while a VPN was active, it is most likely caused by the VPN. Simply turn off or disable the VPN and check if the security messages will still appear. If the security alerts still appear, check the following methods to unlock your Apple ID.
To regain full access to your device, you must first unlock it and then change your password. Also, a completely new password must be created, so ensure your new password is not similar to your previous one.
There are several ways to unlock your Apple ID and change your password. Read on below to learn more of the details.
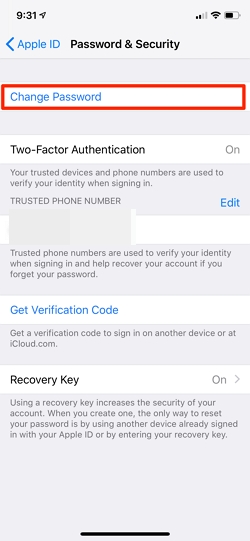
Changing your Apple ID password is the quickest and most straightforward way to unlock your Apple ID. However, you need to know your Apple ID password to do this.
To reset your Apple ID password, follow the steps below.
Simple as that. You can easily unlock and change the password if you have access to it. Because of this, make sure always to remember your passwords.
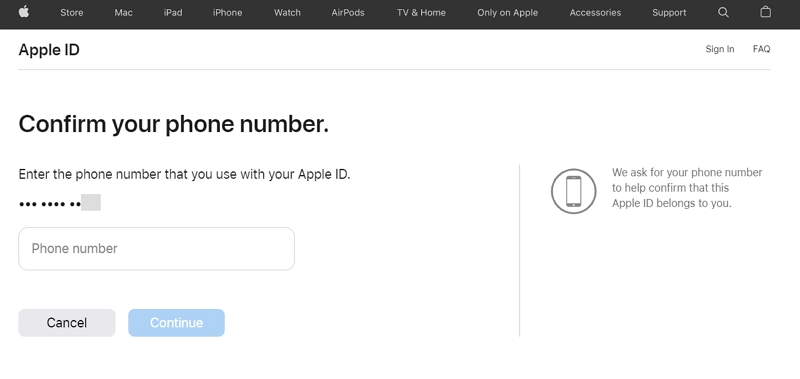
You can fix Apple ID locked for security reasons using a browser. You can do this with the help of the iForgot website. Follow the steps below to get started.
There you have it, with a browser and a phone number used, you can easily unlock your Apple ID.
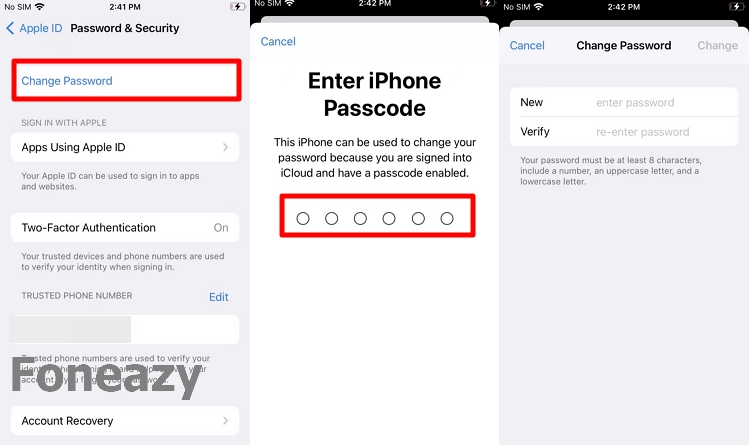
If you have enabled two-factor authentication, then you're in luck. You can use it to fix your Apple ID locked for security reasons.
To unlock your Apple ID using two-factor authentication, follow the steps below.
Simple as that, you're Apple ID is now unlocked. It is recommended to turn on two-factor authentication always.
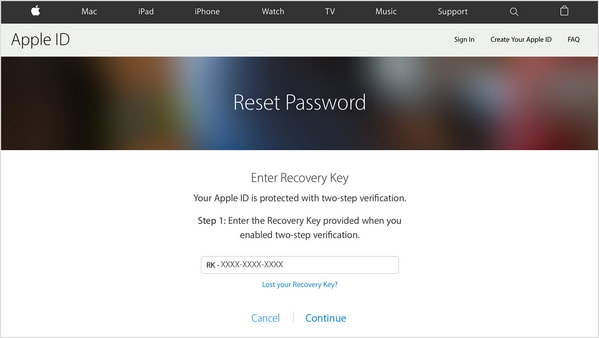
A recovery key can also fix your Apple ID locked for security reasons. Follow the steps below to unlock your Apple ID with a recovery key.
After resetting your password to unlock your Apple ID, you will be prompted to log in once more using a new passcode. Always take note of your recovery key.
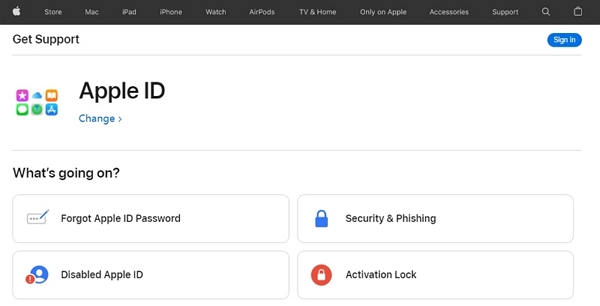
Still locked out of your Apple ID? You can contact Apple's official support directly for assistance. To do this, follow the steps below.
When Apple Support responds, just tell them that your Apple ID has been locked, and they will help with the recovery process.
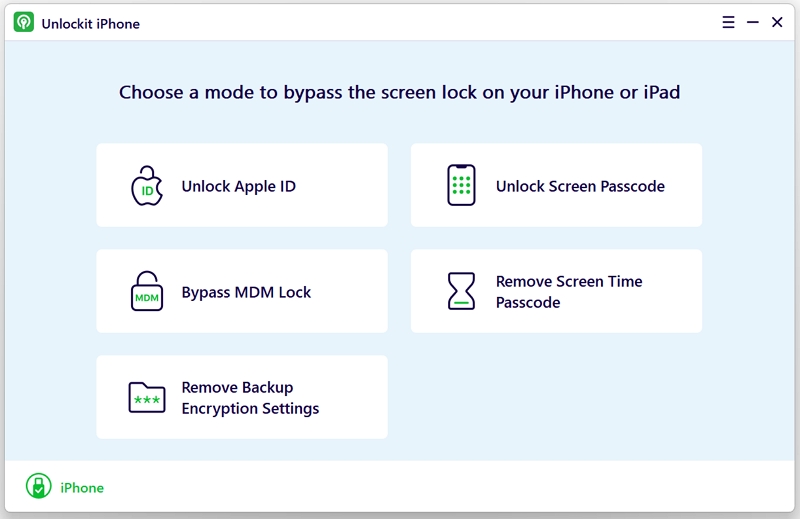
If none of the above methods can successfully unlock your Apple ID, then it is time to use an Apple ID unlocker tool.
Unlockit iPhone is a powerful iOS tool that unlocks Apple ID without requiring Apple ID password in a matter of minutes. Plus, it can get around Screen Time passcode, bypass MDM lock on your iOS device.
Note: All personal information on your device will be entirely deleted during the process. Therefore, make sure to back up all of your important data.
Now, to unlock your Apple ID using Unlockit iPhone, follow the steps below.
Step 1. To begin, download and install Unlockit iPhone on your computer.
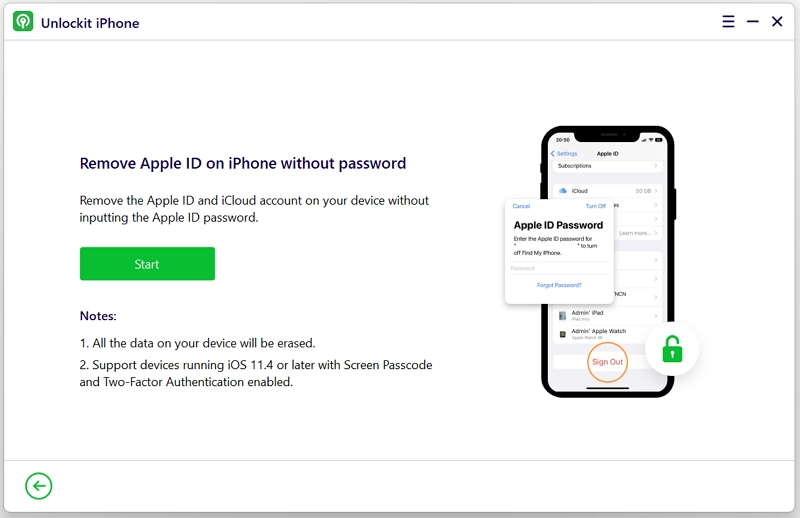
Step 2. Now, launch Unlockit iPhone and click Unlock Apple ID.
Step 3. Next, connect your iOS device to your computer with a working USB cable.
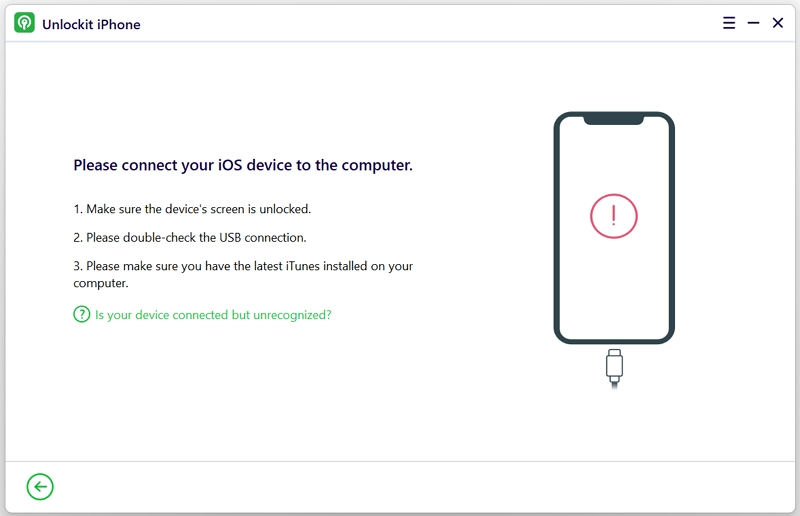
Step 4. Your device will then start to be recognized by Unlockit iPhone. Once your device is detected, click on Start.
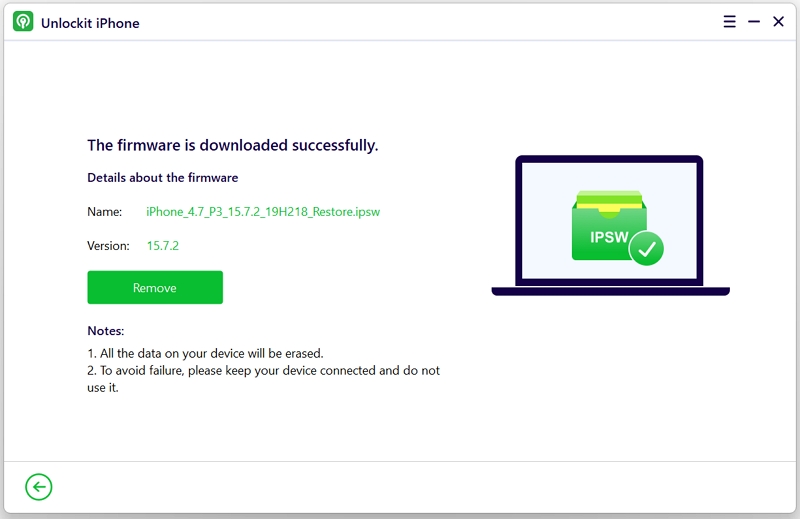
Step 5. Now, Unlockit iPhone will download the necessary firmware. Once the firmware is ready, click Remove.
Finally, click Done after the process has been completed.
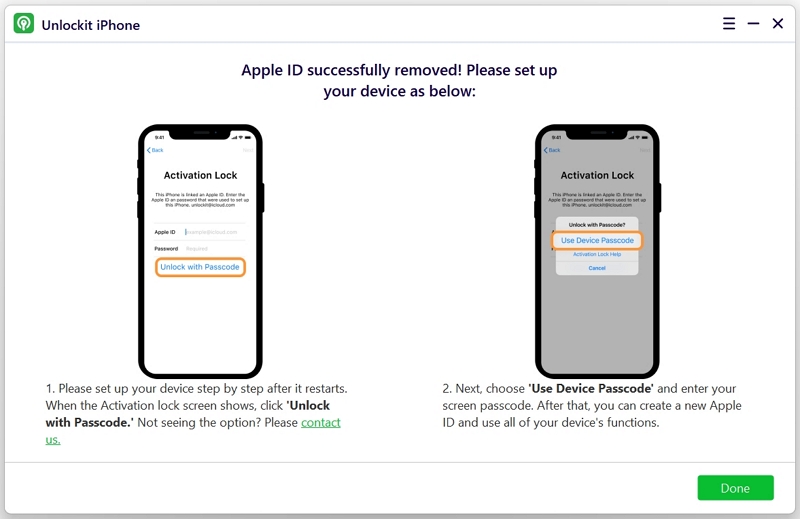
Your Apple ID is now unlocked. You can now sign in with the Apple ID or log in with a new one.
The only downside of using Unlockit iPhone to unlock your Apple ID is that it compromises all your data.
Nevertheless, you can expect that it will get the job done. So, only use this method as a last resort when other methods aside from this are deemed unsuccessful.
There are many ways to get around Apple ID locked for security reasons. Simply follow the instructions above for a successful outcome, and you can complete the task in just a few minutes.
Being unable to access your Apple ID again is bothersome, so take the following actions to prevent it from happening again:
We hope the information in this article will be helpful to you, both now and in the future. If you have any comments, by all means, feel free to leave them.


Mako is a technical writer with a passion for all things tech. Whether you're wondering about how to fix your iPhone or Android device or trying to get something to work in your settings, Mako is your go-to for professional help. He loves writing, testing solutions, and most of all, making sure his research is factually accurate.