Your Apple ID is essential to your iPhone as it allows you to enjoy all Apple features such as iTunes, iCloud, iBooks, and Apple Support. Your Apple ID also ensures that your personal data is safe from hackers, thanks to its high-end security features.
However, things can get problematic if you get locked out of the Apple ID, either because you forgot your password or purchased a second-hand iPhone. If you're facing this issue, don't worry; we have solutions for you. This article will share easy and quick methods to bypass an Apple ID on an iPhone or iPad.
Interested? Read on to learn more.
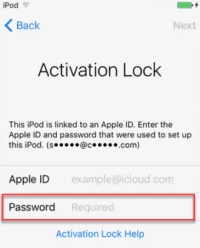
If your device is stuck on the Activation Lock or Locked to Owner screen after a factory reset and you can't recall your Apple ID credentials, we recommend using the Unlockit iCloud remover to bypass the Activation Lock in just a few steps. The following are its main features:
Follow these simple steps to bypass the iCloud Activation Lock on your iOS device using Unlockit:
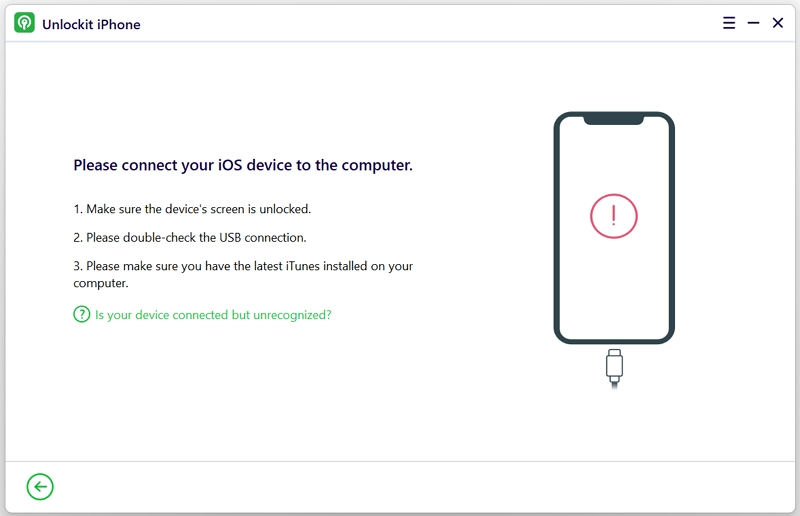
Step 1: Download and install Unlockit on your computer. Open the program and connect the iOS device to the computer using a USB cable. Click "Start" to begin.

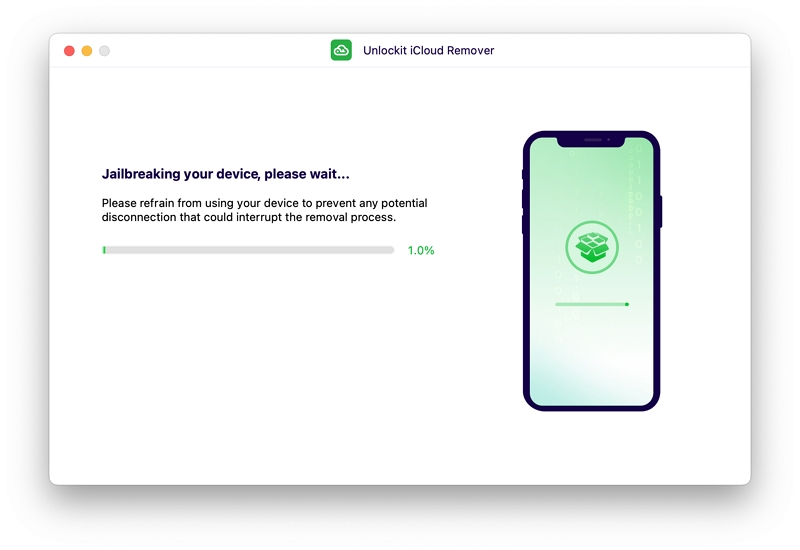
Step 2: You will need to jailbreak the device before it can be unlocked. The program will detect your device and either jailbreak it automatically or guide you through the jailbreak process step by step. Follow the instructions carefully to avoid any issues.
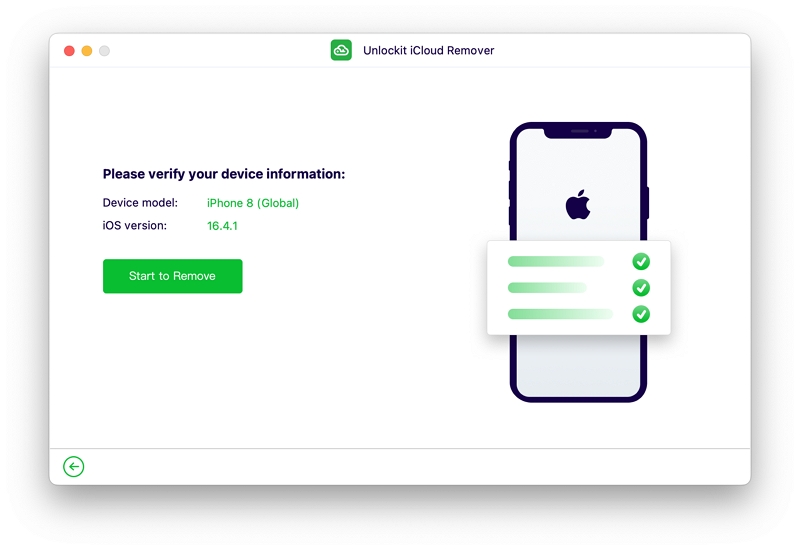
Step 3: After jailbreaking your device, confirm its details on the next screen and then click "Start to Remove" to begin unlocking it.
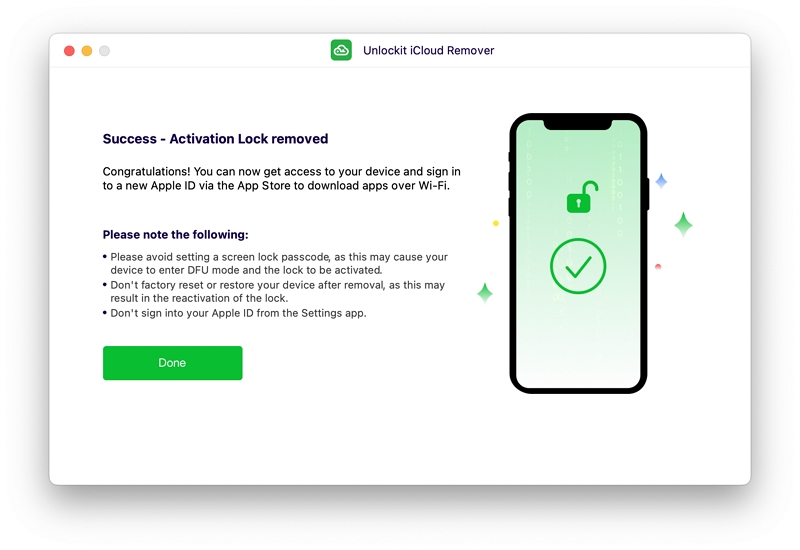
Step 4: Avoid using the device while Unlockit is unlocking it. You should see a notification on the screen when the process is complete. You can then access your device and continue using it.
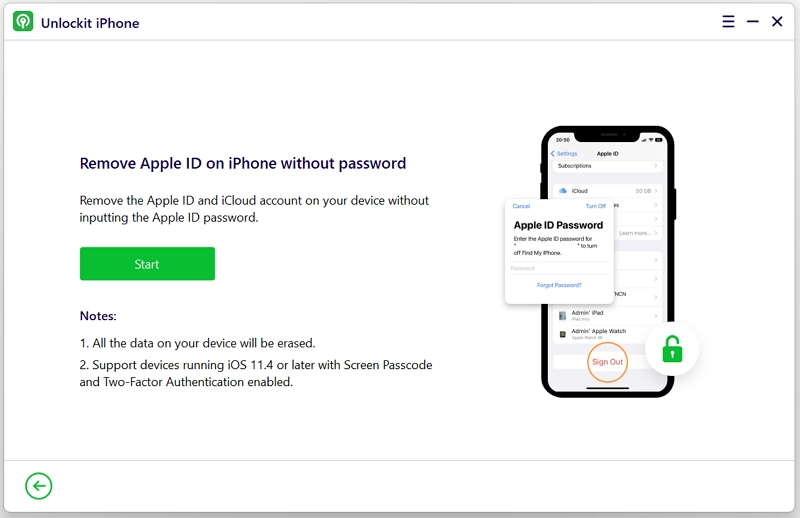
If your device is not stuck in Activation Lock and you just want to sign out of the Apple ID from settings but don't know the password, this section is for you.
When the Find My iPhone feature is activated, it might be harder to bypass the Apple ID without a password on your device. Fortunately, you can still rely on some Apple ID unlocking software to bypass the iCloud account easily.
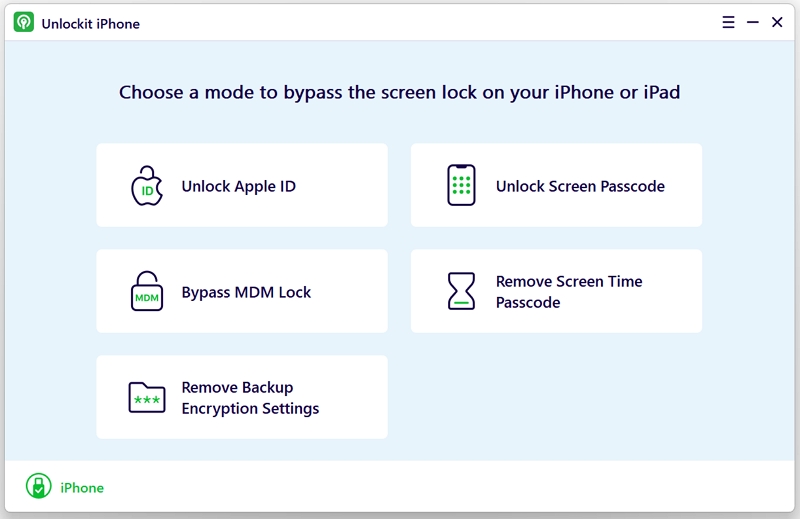
One reliable app to fix this issue is Unlockit iPhone, an iOS screen bypassing tool that is user-friendly and can unlock or remove an Apple ID on an iPhone or iPad without a password in a few easy steps.
Note: The Apple ID unlocking feature is compatible with iOS 11.4 or later devices that have Screen Passcode and Two-Factor Authentication enabled.
Unlockit iPhone's primary features include:
Follow the steps below to bypass Apple ID using Unlockit iPhone.
Step 1. The first step is to download and install Unlockit iPhone on your computer.
Step 2. Launch the program. From the options, select the Unlock Apple ID button.
Step 3. Next is to connect your iPhone device to your PC via a USB cable.
Step 4. On the next screen, tap the Start option. Wait for the process to finish, and make sure not to remove the connection during the process.
Step 5. Once the process is done, a prompt will appear saying that unlocking was successful. Tap Done to finish.
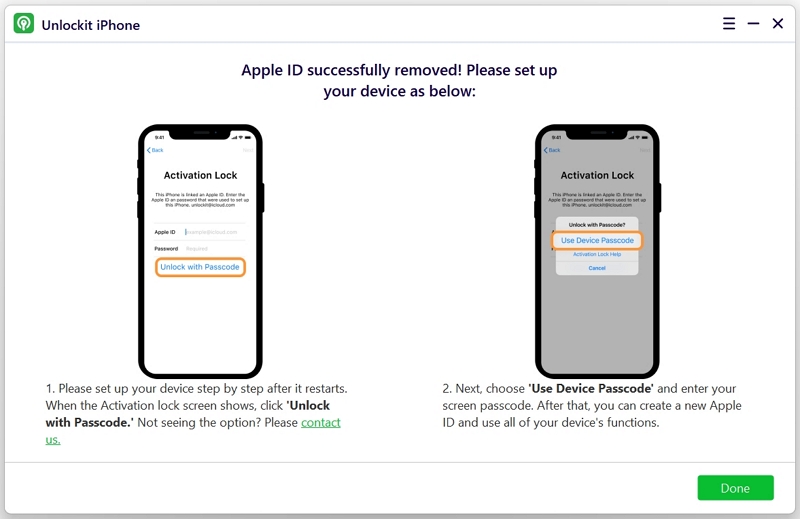
Now, you can sign in to a new Apple ID on your device.
If you've purchased your iPhone and found that it's still associated with a previous owner's Apple ID, the following steps may help as long as you can still contact the previous owner of the unit.
Alternatively, this method works to remove the activation lock on your own iPhone! The previous owner will need to remotely erase the device and then remove it from their iCloud account by following the steps below.
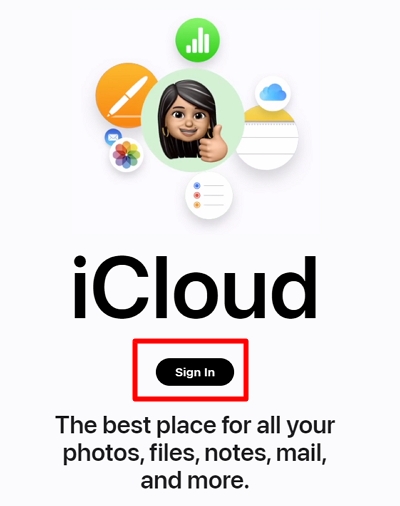
Step 1: Sign in to iCloud.com using the Apple ID associated with the second-hand phone.
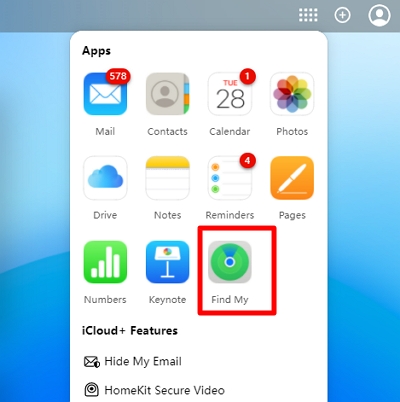
Step 2: On the website, tap on the Find My option.
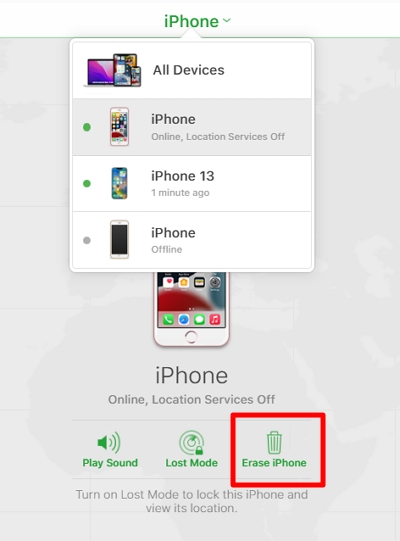
Step 3: On the next screen, click the All Devices button. Scroll down the list of devices and click the name of the iPhone you wish to remove.

Step 4: On the next screen, choose Erase iPhone/iPad.
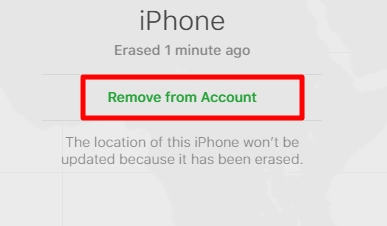
Step 5: Once the device is erased, select the Remove From Account option just below the device's name.
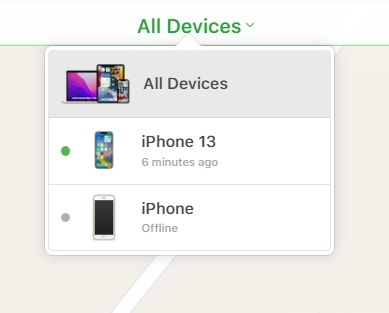
Step 6: Once it's removed, the device will be removed from the previous owner's device list, and the new owner can now sign in or create a new Apple ID.
If your iPhone is locked because you forgot your password and made a few failed attempts to sign in, you can easily unlock your Apple ID by resetting the password.
If you don't have access to the previous trusted number anymore, read this tutorial to learn how to unlock your Apple ID without a phone number.
Follow the steps below to reset your Apple ID password:
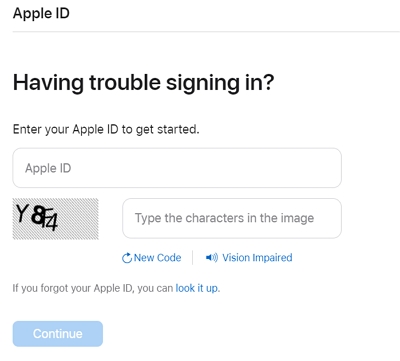
Step 1: Visit iforgot.apple.com. On the site, enter your Apple ID.
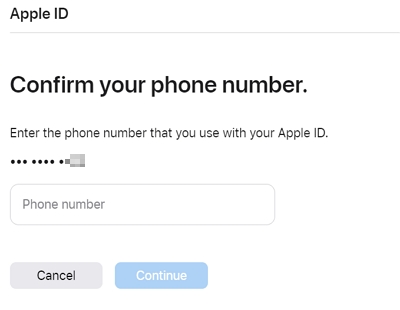
Step 2: Apple may ask you to confirm your mobile number before proceeding.
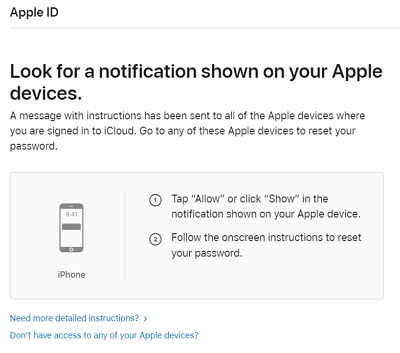
Step 3: The page will remind you that there is a Password Reset Notification shown on your Apple devices.
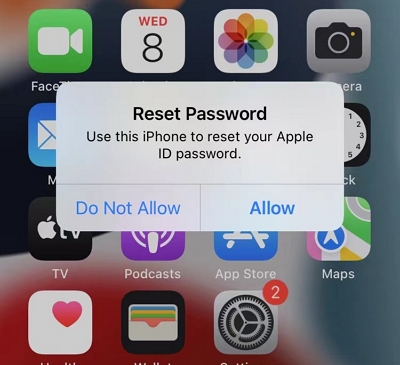
Step 4: On any of your iPhones with the Apple ID logged in, a prompt will appear saying, "Use This Phone To Reset Your Apple ID Password." Click Allow to continue.
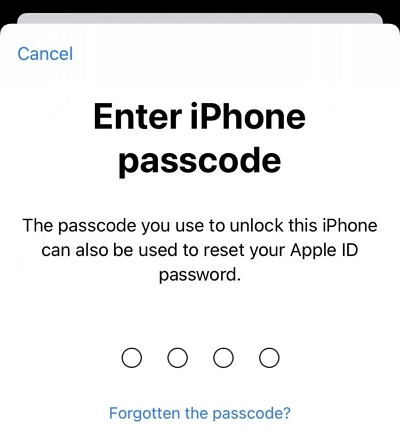
Step 5: Apple might ask you to provide the screen passcode of the device. Enter the passcode to continue.
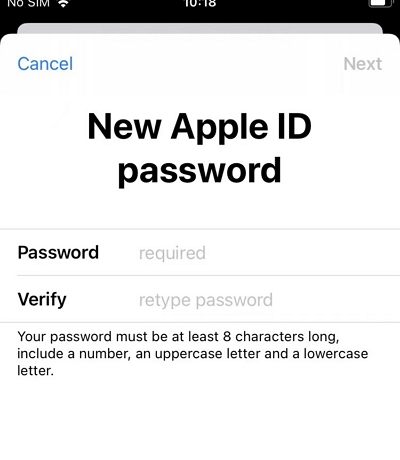
Step 6: Next, provide a new and strong password. Make sure to jot your password down on a piece of paper or in a record book in case you forget it in the future.
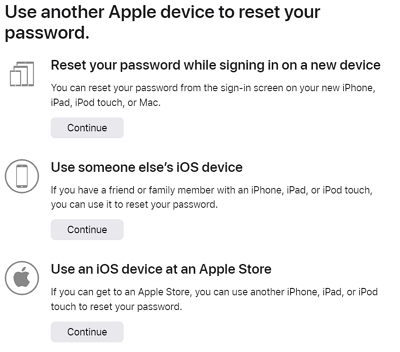
If you can't access other devices, click on the option "Don't have access to any of your Apple devices?" and follow the instructions provided.
Note: If you're using two-factor authentication, Apple may send a verification code to your trusted device or phone number, which you will need to enter before being able to set up a new password.
For older iOS versions such as iOS 11 and below, you may need to go through two-step verification, wherein you need to type the 14-digit code sent to you when you set up the two-step verification.
If you cannot remember this code, you will need to use another alternative wherein you answer a series of security questions before being able to reset your password.
When a device is corporate-owned and a former employee wipes it (for example, when leaving the company), you may not have access to the associated account. Apple provides an activation lock bypass code to resolve this issue, which is available through the management system the company uses on their administration portal.
Note: The activation lock bypass code is only available for devices in "supervised" mode, which requires the device to be enrolled using a supervised enrollment method (e.g., DEP).
To use the activation lock bypass code to bypass the Apple ID:
Step 1: Have the administrator log in to the administration portal.
Step 2: Click on "Devices," then select the relevant device.
Step 3: Click the "Action" drop-down and select "Show Activation Lock Bypass Code."
Step 4: The code will be shown for you to manually enter into the device.
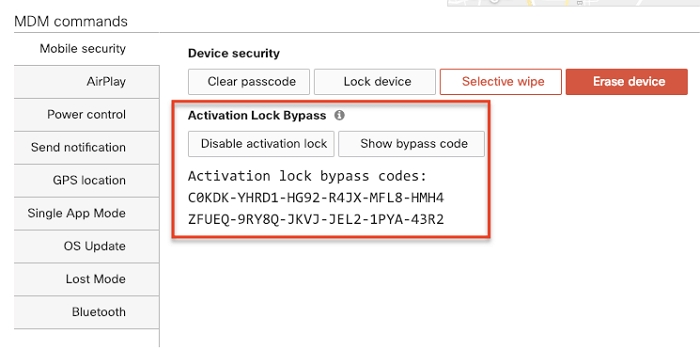
Step 5: Enter the code into the password area on the Activation Lock screen.
Being stuck on someone else's Apple ID or being locked out of your own Apple ID because you forgot your password can be frustrating. Fortunately, there are various methods you can try to bypass Apple ID.
Among all the methods discussed in this article, the quickest way to bypass Apple ID is Unlockit iPhone or Unlockit iCloud Remover, depending on whether your device is stuck on iCloud lock or not. These apps are very easy to use, meaning you don't have to be a pro to operate them.
Even if you can no longer contact the previous owner of the device, you can still bypass Apple ID with just a few taps using these software solutions.
We hope this article helped you bypass Apple ID and finally enjoy all the features of your iPhone. If you have any questions or comments, don't hesitate to type them in the comments below.


Mako is a technical writer with a passion for all things tech. Whether you're wondering about how to fix your iPhone or Android device or trying to get something to work in your settings, Mako is your go-to for professional help. He loves writing, testing solutions, and most of all, making sure his research is factually accurate.