 by Maggie Mueller
Updated On Jul 25, 2025
Published On Jul 25, 2025
Basic iPhone Tips Ideal for Newbies
by Maggie Mueller
Updated On Jul 25, 2025
Published On Jul 25, 2025
Basic iPhone Tips Ideal for Newbies
A new iOS update often comes with exciting features that many users are eager to try. With the release of iOS 26 public beta, you can get a sneak peek at the latest additions by installing it on your iPhone.
However, things don't always go as smoothly as expected. The update might cause issues such as your device getting stuck, apps not working properly due to compatibility problems, or new features that just aren't as impressive as you'd hoped. If that's the case, you might be thinking about going back to the previous version.
In this article, we'll walk you through everything you need to know about downgrading from iOS 26 beta to iOS 18—step by step.
Before you can downgrade iOS 26 beta to iOS 18, there are several factors that you must keep in mind. These include the following:
Downgrading your iPhone to an earlier version like iOS 18 will completely erase your device. According to Apple, If you back up a device that has iOS or iPadOS beta to iCloud or your computer, the backup won't work with earlier versions of iOS or iPadOS, meaning backups created on a beta version like iOS 26 cannot be restored to an older version such as iOS 18.
In other words, if you made a backup while using iOS 26 beta, it won't work once you downgrade to iOS 18. You can only restore from a backup made before you installed the beta.
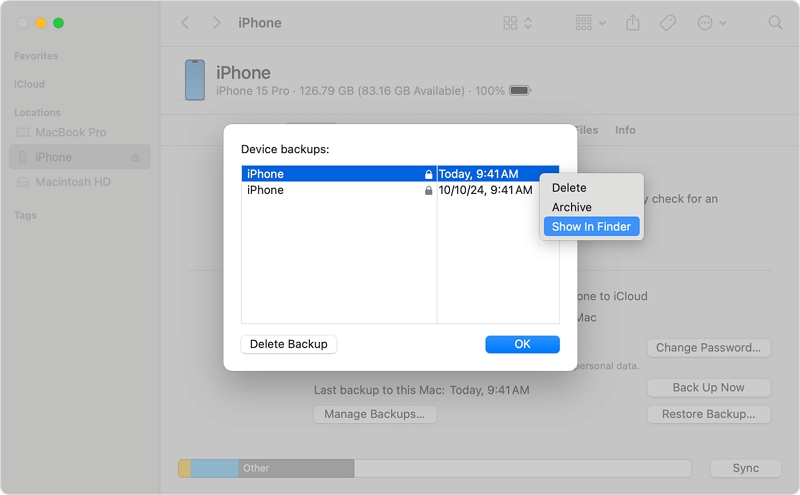
If you have a recent iOS 18 iCloud or iTunes backup made before upgrading to iOS 26, you'll be able to restore nearly all of your previous data after the downgrade—except for anything created after that backup. To locate the backups of your iPhone on your computer, check Apple's guide.
However, if you don't have a pre-existing backup, all of your current data will be lost during the downgrade. So in this case, carefully consider whether it's worth downgrading and losing everything on your device. If not, we recommend staying on the iOS 26 beta until a more stable or official release becomes available.
Yes, it's still important to create a backup of your current iOS 26 beta, just in case the downgrade process fails or causes unexpected issues. Even though you can't restore a full iOS 26 backup to iOS 18, you may still be able to manually recover certain data types later using third-party tools.
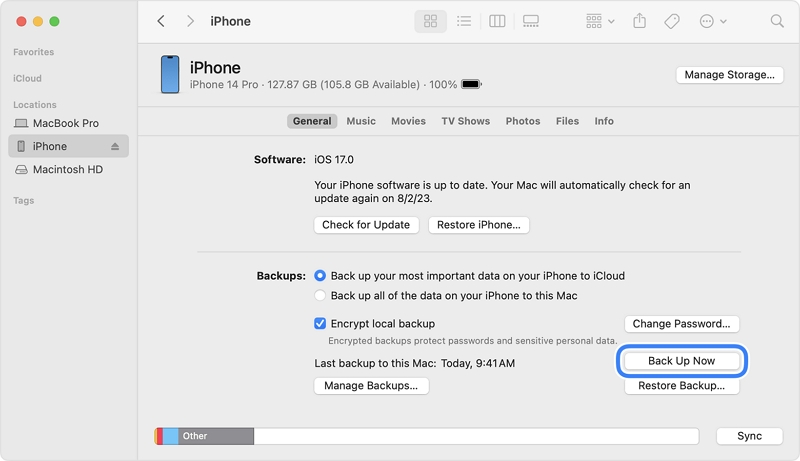
To back up your iPhone, follow Apple's guide: https://support.apple.com/guide/iphone/back-up-iphone-iph3ecf67d29/ios
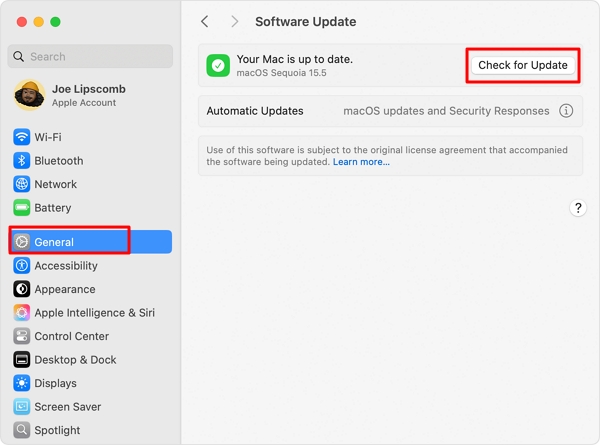
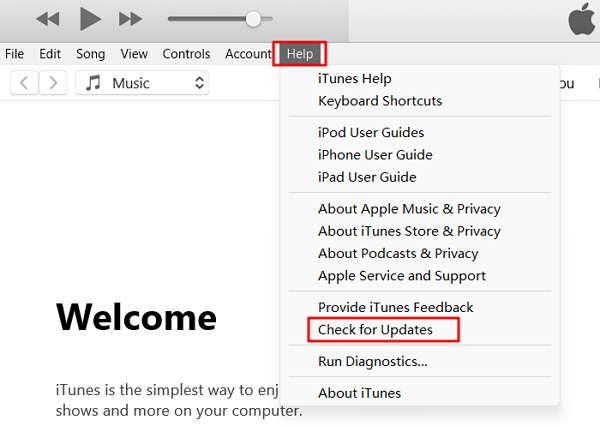
To avoid any issues during the downgrade, ensure that your computer is running the latest version of macOS or Apple Devices (on Windows):
On Mac:
On Windows:
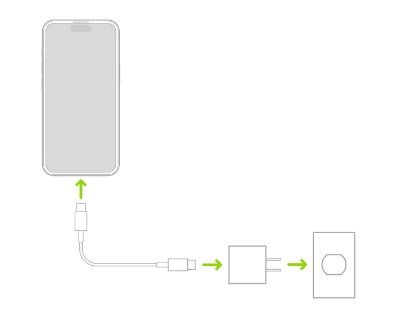
A low battery or weak internet connection can interrupt the process and lead to errors. To ensure a smooth and uninterrupted downgrade, make sure to:
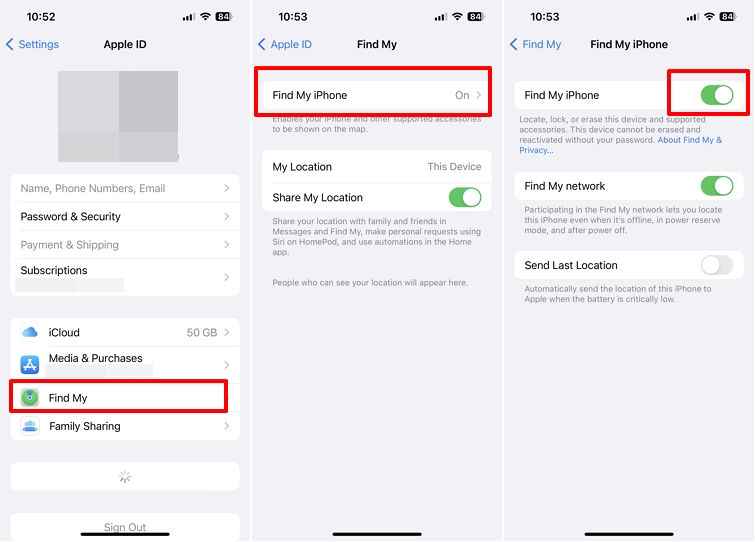
Before you downgrade your iPhone, you must turn off Find My iPhone. This ensures the downgrade process goes smoothly. Once the downgrade is complete and iOS 18 is reinstalled, you can turn it back on.
To turn off Find My iPhone:
If you're looking for a safe and smooth way to downgrade from iOS 26, we recommend using our TinyFix iOS System Repair Tool. TinyFix lets you downgrade from iOS 26 to iOS 18 with clear step-by-step instructions and helpful on-screen guidance.
Unlike traditional methods, TinyFix does not require iTunes and you don't have to manually search for and download an IPSW file. Additionally, it can help fix common iPhone system issues without losing data, such as: iPhone stuck on a black screen, stuck on the Apple logo, or frozen device that won't turn on.
To downgrade from iOS 26 using TinyFix:
Step 1: Download and install TinyFix on your computer.
Step 2: Follow the installation wizard to complete the setup. Once installed, launch the program and choose "iOS System Repair" from the main screen.

Step 3: Connect your iPhone to the computer and select "Deep Repair Mode" to begin the downgrade process.

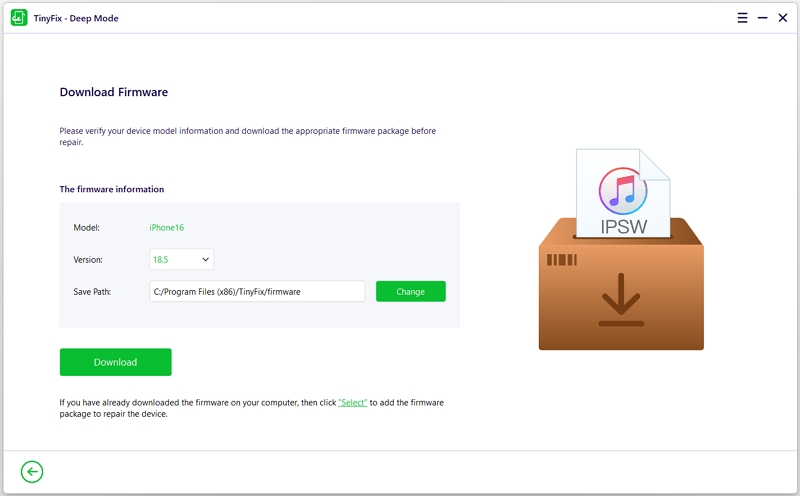
Step 4: The program will display a list of available iOS firmware versions. Choose iOS 18, ensure your computer is connected to the internet, and click "Download".
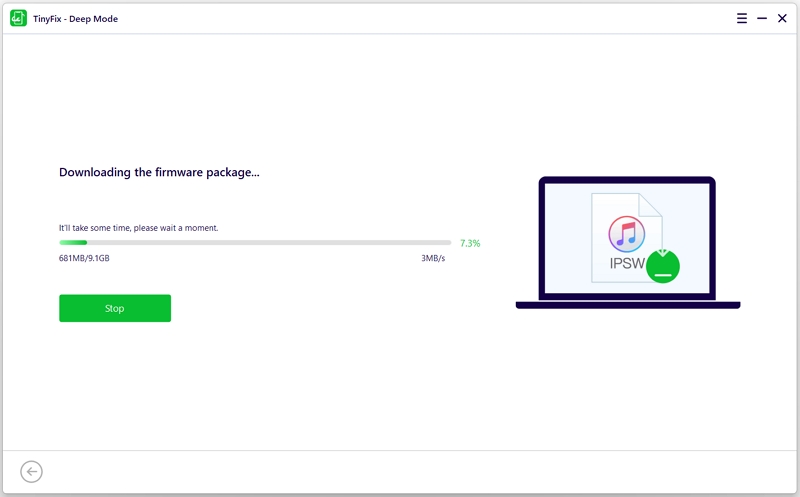
Step 5: TinyFix will begin downloading the required firmware. Please wait while the download completes—this may take a few minutes depending on your internet speed.
Step 6: Once the download is complete, click "Fix Now". The downgrade process will begin. Keep your device connected until the process completes and your iPhone restarts.

If you prefer the free, manual method, you can downgrade using Finder on macOS or iTunes / Apple Devices app on Windows. Please note that this method is more technical and time-consuming than using TinyFix.
Step 1: Make sure your computer is running the latest software:
Step 2: Open Finder, iTunes, or the Apple Devices app, and connect your iPhone to the computer.
Step 3: Put your iPhone into Recovery Mode:

Step 4: A pop-up will appear in Finder/iTunes saying a device in recovery mode has been detected. Click "Restore" to erase the device and install the current non-beta version of iOS.

If the download takes more than 15 minutes and your iPhone exits recovery mode, let the download finish, then repeat the steps to re-enter recovery mode.
Step 5: Once the process completes, your iPhone will restart with the latest public iOS version. You can now set it up as new or restore from a compatible backup.
If you'd rather not connect your iPhone to a computer and go through the steps to downgrade from the iOS 26 beta, there's a simpler alternative—you can stay on iOS 26 beta and wait for a more stable update or the official public release.
This option doesn't risk losing your data or files, but it does mean you'll need to live with the beta version a bit longer. The good news is that Apple regularly improves the beta in each update, and the next version is likely to be more stable and polished.
To make sure you receive future iOS 26 updates:
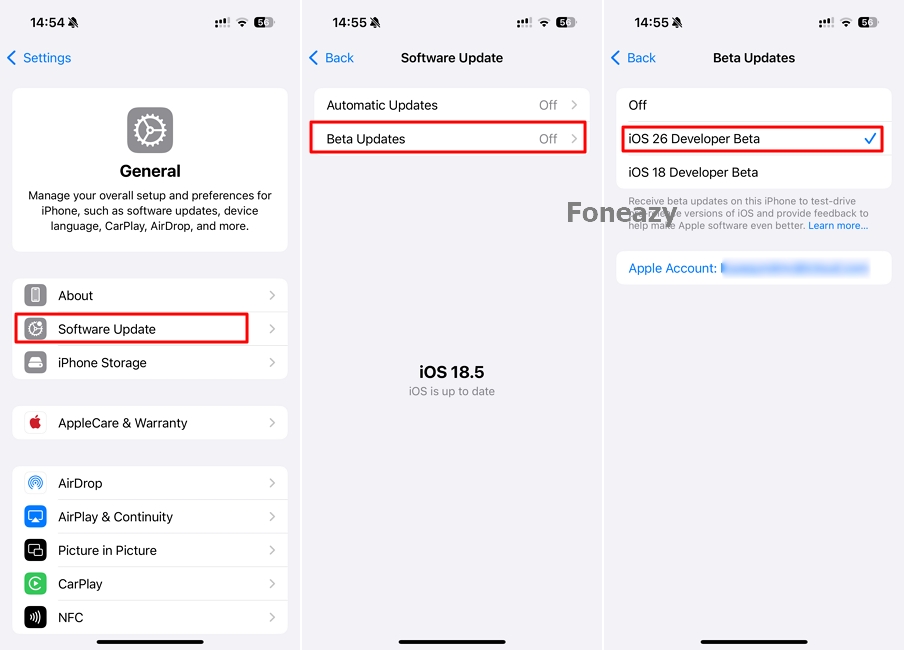
If you receive an update alert, it means it's time to install the latest version. Just go to:

Once the downgrade is complete, your iPhone will display the "Hello" screen. Now it's time to restore your iPhone from your pre-existing backup. Follow the on-screen setup instructions until you reach the "Transfer Your Apps & Data" screen, where you'll be able to choose how you want to restore your data.
You'll have the option to restore data from:
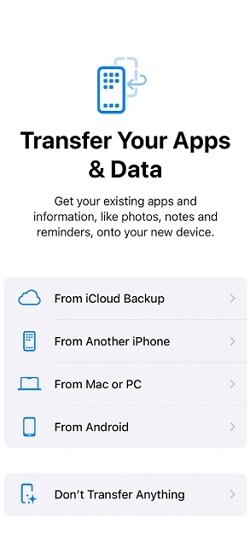
To restore data from a Mac or PC backup:

Sometimes, the iOS 18 downgrade process may fail. Common reasons include a slow or unstable internet connection, using a non-original Apple USB cable, or not having enough storage space on your computer—this can cause the firmware download to fail.
If your downgrade fails, try the following steps:
Step 1. Check your setup:
Step 2. Put your device into recovery mode:
Step 3. Retry the downgrade process:
That's everything you need to know about how to downgrade from iOS 26 to iOS 18. You can choose a quick and user-friendly tool like TinyFix to simplify the process, or go the manual route using iTunes, Finder, or the Apple Devices app on your computer. If you prefer to stay on iOS 26 for now, that's perfectly fine too.
Before downgrading, make sure you've reviewed all the key points we covered above—especially around backups and potential data loss. We hope this guide has been helpful! If you have any questions or experiences to share, feel free to leave a comment below.
