 by J. Robertson Macaulay D. Young
Updated On Jul 19, 2024
Published On Jul 26, 2022
Basic iPhone Tips Ideal for Newbies
by J. Robertson Macaulay D. Young
Updated On Jul 19, 2024
Published On Jul 26, 2022
Basic iPhone Tips Ideal for Newbies
If you're setting up a new iPhone using your current iPhone running iOS 11, iPadOS 13, or later, you can use Quick Start to wirelessly transfer all your data. However, sometimes the process gets stuck on the "Preparing to Transfer" screen. This guide will help you resolve the iPhone getting stuck on the "Preparing to Transfer" issue step by step.

The time required to transfer data varies depending on network conditions and the amount of data being transferred. It can range from 15 minutes to several hours. Some users have reported transfer times of 17 to 48 hours. So, it's best to perform the transfer when you won't need to use your current device for a while.
The transfer process can take a long time, especially if you have a lot of data to move to the new device. You may need to allow ample time for the transfer to complete. If the process has already started and you have enough time, simply wait for the preparing to transfer process until it finishes.
Having sufficient power on your iPhone is essential for a smooth data transfer. Your iPhone may slow down as the battery depletes to conserve energy. To prevent this, you'll need to plug your phone into a power source for at least 30 minutes during the waiting.
For the data transfer process to work, both devices need to be connected to the same Wi-Fi network. Ensure the network is strong enough to facilitate the transfer. To verify the connection, go to Settings > Wi-Fi on both devices.
Ensure that both iPhones are close to each other during the data transfer using the "Quick Start" menu. If the devices are too far apart, you may encounter issues such as getting stuck on "Preparing to Transfer."
If you don't want to wait anymore, force restart your iPhone to stop the data transfer. To ensure a smooth iPhone data transfer next time, make sure to follow the steps below before you try again.
If the transfer gets stuck on the prepare to transfer for quite a long time, a force restart can help you stop the stuck data transfer.
Force Restart iPhone 8, and Later

Force Restart iPhone 7 and iPhone 7 Plus

Force Restart iPhone 6s and earlier

When both of your devices restart, ensure your iPhones are connected to a working and strong Wi-Fi network by opening Safari or YouTube or running a speed test. If the network signal is weak, restart your Wi-Fi router or switch to a different Wi-Fi network. And, you'll need to reset the network settings to rule out any network errors.
To reset network settings:
Perform this for both devices. After they restart, connect them to a Wi-Fi network and try transferring the data again.

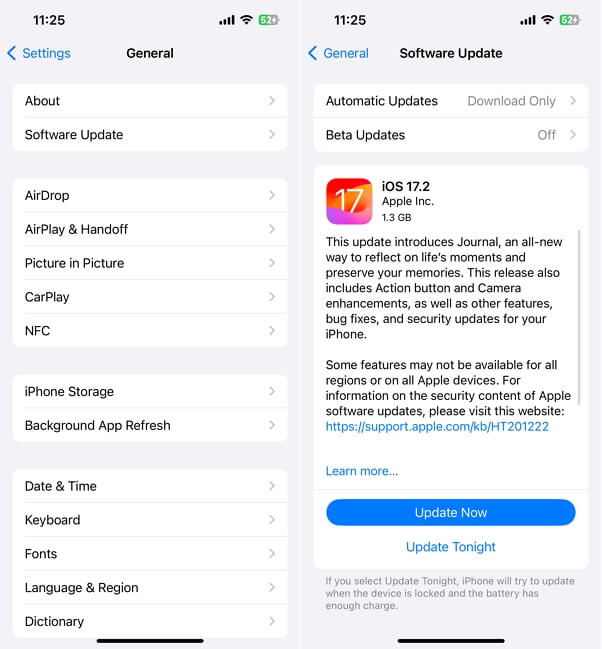
Moreover, ensure both your old and new iPhones are updated to the latest iOS version before attempting the transfer again.
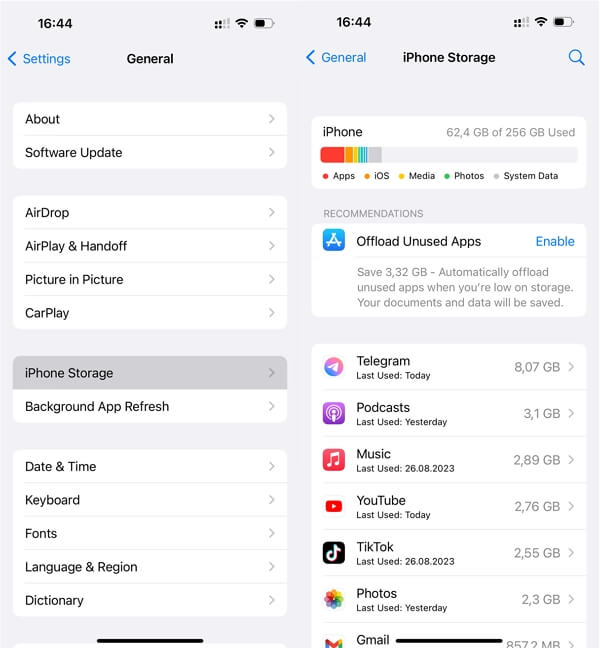
The amount of data you're transferring affects the speed of the transfer. If the data size is large, the process may slow down or fail, especially if the source phone is almost full. Freeing up space on your old iPhone can help:
Sometimes, you may need to connect to Apple Servers to complete the transfer and other related functions, such as signing in to your Apple ID. Visit Apple's System Status page to ensure all relevant services are operational. If any service is marked in red, you might need to wait until it's back online before attempting the transfer again.

If none of the above solutions worked, and your iPhone is still stuck on preparing to transfer screen, you can use TinyFix, an iOS system repair tool designed to fix various system bugs on iPhone without causing data loss.
Here's how to use it:
Step 1: Download and install TinyFix onto your computer.
Step 2: Open TinyFix and connect your device to the computer using a USB/lightning cable. Click "iOS System Repair" when the program recognizes the device.

Step 3: Select "Standard Repair" and confirm the selection.

Step 4: The program will prompt you to download the latest firmware. Click "Download" to initiate the process.

Step 5: Once the download is complete, click "Fix Now" to start the repair.

The process takes a few minutes, and your iPhone will restart. You should then be able to transfer your data easily.
If you can't resolve the problem with Quick Start, try transferring data via iTunes. This method involves backing up the old device to iTunes and then restoring the backup to the new iPhone.
Wait for the backup to be restored to the new device and complete the setup steps on the new iPhone.

If the above solutions do not resolve the issue, it may be time to seek professional help. Contact Apple Support through their website, providing a detailed description of the problem and the steps you've already taken. They should be able to help you find a solution.
The "Quick Start" feature is designed to simplify switching to a new device, but sometimes issues beyond your control can arise. We hope this guide helps you overcome these problems and complete the setup of your new iPhone.

Mako is a technical writer with a passion for all things tech. Whether you're wondering about how to fix your iPhone or Android device or trying to get something to work in your settings, Mako is your go-to for professional help. He loves writing, testing solutions, and most of all, making sure his research is factually accurate.