"My iPhone is asking for a passcode I have never set before, and now I am unable to access my device. What should I do? Is there a default passcode that I need to enter to get out of this mess?"
Have you ever encountered your iPhone requesting a passcode you never set? It can be a perplexing scenario, but fear not! In this guide, we'll delve into the reasons behind your iPhone's unexpected passcode request and provide straightforward steps to regain control. Let's dive into the solution and restore your iPhone to smooth operation.
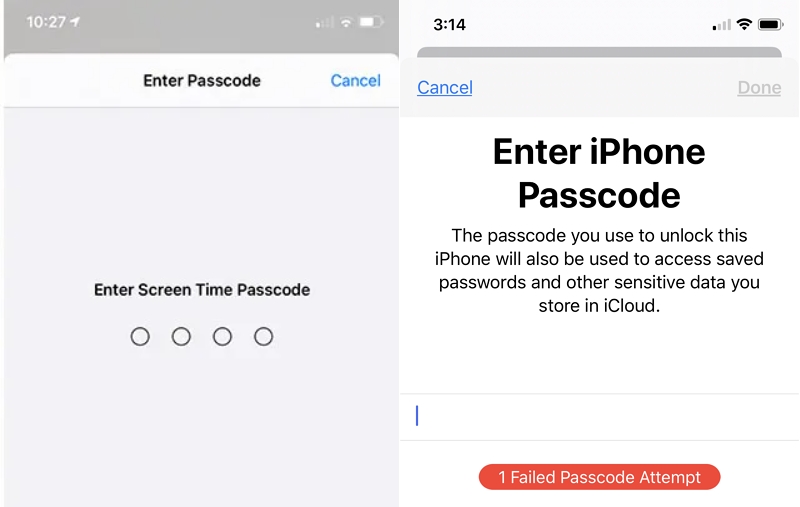
One of the most common issues users face is the confusion between a Screen Time passcode and a Screen Passcode. Screen Time passcodes are often employed as a parental control measure on children's devices.
The first step is to ensure that you're dealing with a Screen Passcode issue. Once you've clarified this distinction, you can proceed to the hacks and solutions outlined below.
If your device is prompting for a Screen Time passcode that you neither set up nor remember, please refer to this article on Screen Time passcode.
Additionally, it's possible that your device is locked to a carrier's SIM lock. In such a scenario, you'll need to reach out to the carrier it's locked to and inquire about their unlocking policy.
If you find yourself locked out of your device and your Screen Passcode isn't working, it could indicate that someone with knowledge of your passcode has accessed the iPhone and altered it without your consent. This constitutes a breach of trust, and we advise against entrusting your device to just anyone.
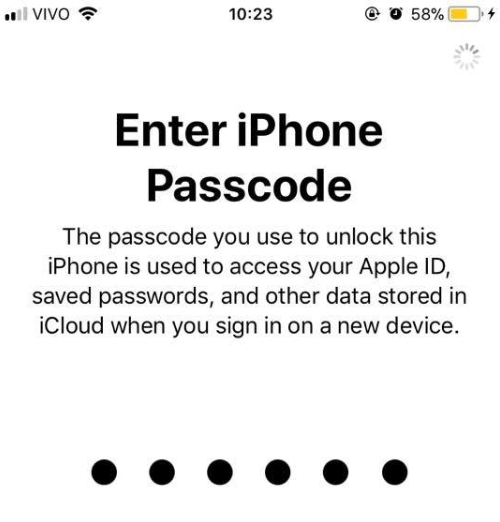
Furthermore, there are no default passcodes for iPhones. It may seem impractical and inconvenient, but why would Apple establish a default passcode for their iOS devices when users typically set their own upon device setup? Therefore, the only passcode on the iPhone is the one you've personally set. Exercise caution regarding your data and privacy.
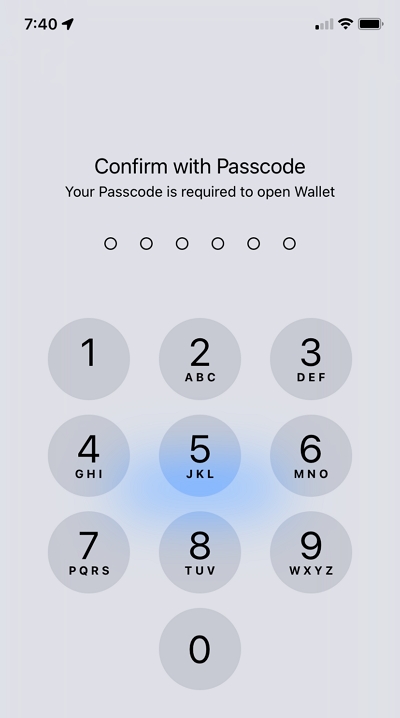
Users have reported that setting an Apple Pay password might automatically overwrite the previous Screen Passcode. Therefore, you can attempt unlocking your device by entering the Apple Pay password as well.
When you power on a new iPhone for the first time, the screen typically displays a friendly "Hello" screen, guiding you through the initial setup process. As part of this setup, you're prompted to create a passcode to secure your device. If your phone is new and you don't encounter this hello screen, something may be amiss.
In such a scenario, we recommend visiting the Apple center and bringing proof of purchase with you. The staff at the center can help ascertain if your iPhone has been refurbished or tampered with.
If you've never set up any passcode, yet your iPhone continues to prompt for a passcode you never configured after updating iOS or restoring your device, it's possible that the issue stems from glitches in the iOS update or restoration process. In such cases, the only solution is to seek assistance from experts and contact Apple directly, especially if you're uncertain about your technical abilities.
Expect the technician to walk you through a verification process before aiding in unlocking or replacing your iPhone. This procedure is implemented for security purposes, ensuring that only authorized individuals can access the device.
If your iPhone is not newly bought or your Apple warranty has expired, you can try the following methods to unlock the unknown passcode for your iPhone.
As mentioned earlier, there are several types of locks, so it's essential to identify the specific type before proceeding to the next step. Here's a breakdown of possible scenarios and corresponding actions:
Remember to follow the appropriate steps based on the type of lock you're facing to resolve the issue effectively.
If you've confirmed that your iPhone requires a screen passcode you never set, and there isn't any chance that someone changed your passcode without your knowledge, and this issue occurred after updating your iOS or restoring your iPhone, you'll need to take it to an Apple Genius Bar. They can help you determine the cause and ideally unlock your device without restoring it, thus avoiding any data loss.
If you are looking for a quick way to unlock your iPhone and regain access, Unlockit iPhone is the best solution.
This iOS unlocking tool can assist you in unlocking an iPhone with an unknown passcode in just three simple steps, regardless of whether the passcode is a 4-digit code, 6-digit code, Touch ID, or Face ID. Unlockit iPhone can bypass them without hassle.
Moreover, it can unlock the MDM lock, Screen Time Passcode, and even allows you to remove Apple ID without a password. It is compatible with the latest iOS 17 and can be downloaded on both Windows PCs and Mac computers.
Follow the steps below to learn how to bypass the unknown passcode on your iPhone:
Start by connecting the iPhone to your computer and running the software
Next, click on "Unlock Screen Passcode" and tap on "Start."
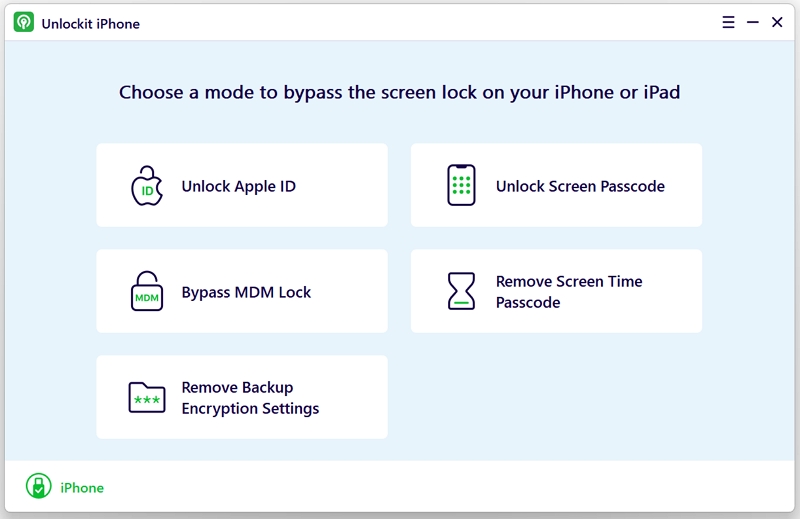
The program will detect the connected iPhone and prompt you to download the corresponding firmware. Click on the "Download" button to proceed.
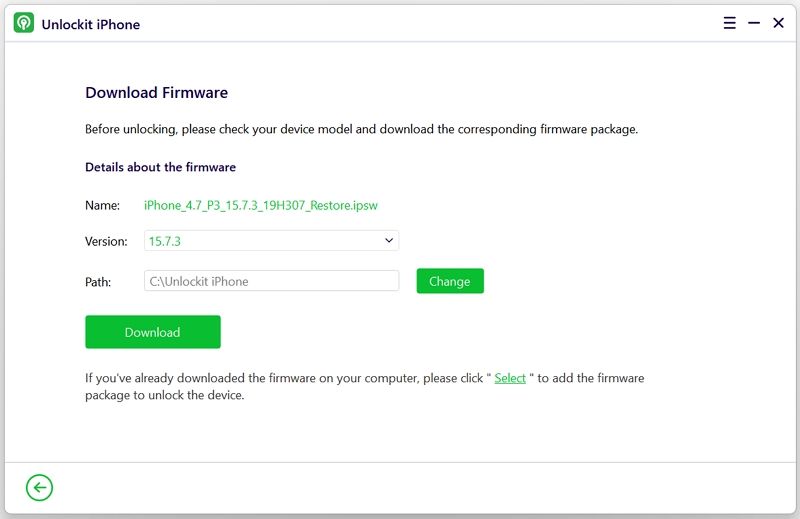
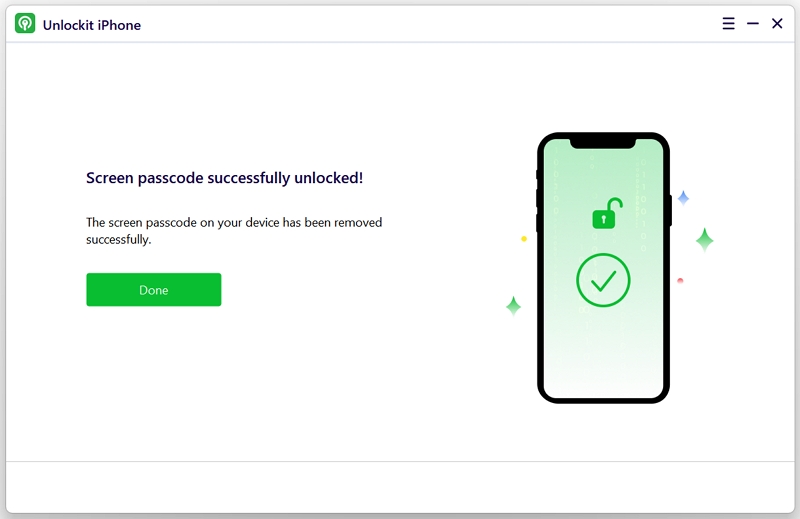
Once the firmware is downloaded, click "Remove" to fix the issue. Unlockit iPhone will notify you as soon as the process finishes.
That's it!
Users with limited technical know-how may feel stressed about putting the iPhone into Recovery Mode using iTunes to restore the device. However, by following these steps, you can easily learn the process; it's not as complicated as it seems. While we still recommend using Unlockit iPhone, knowing a few alternatives, especially official solutions, can be helpful.
Here are the steps:
Step 1: Open iTunes or Finder on your computer (depending on your system).
Note: Launch iTunes if using a Windows PC or a Mac with macOS Mojave or older. Otherwise, use Finder.
Step 2: Connect the locked iPhone to the computer.
Step 3: If the software detects the device and it has been synced with it, tap the "Restore iPhone" option to complete the process.

Step 4: If the computer doesn't detect the iPhone, put the device into Recovery Mode as follows:
iPhone 8 or later: Quickly press and release the Volume Up button, then the Volume Down button, and finally, hold the Side button until you see the Recovery Mode screen.

iPhone 7/7 Plus: Hold the Volume Down and Side buttons together until the Recovery Mode screen appears.

iPhone 6 or older: Hold the Home and Side buttons simultaneously until the Recovery Mode screen shows up.

Step 5. Click on "Restore" and follow the on-screen instructions to complete the restoration process.
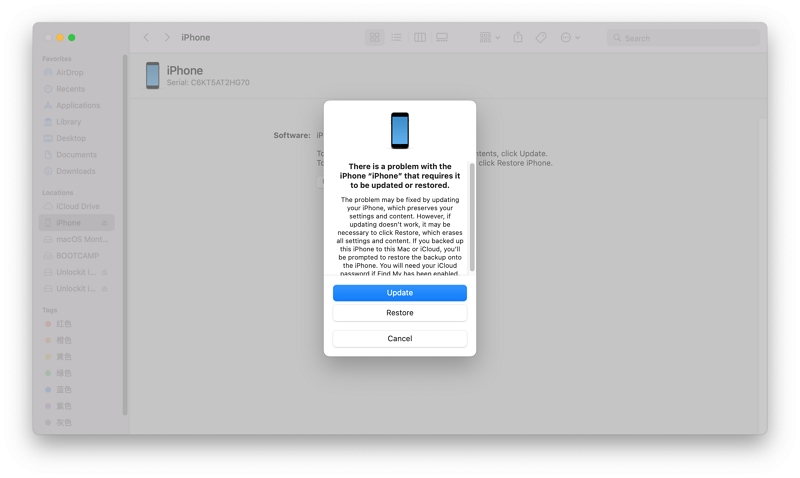
Congratulations! Your iPhone passcode is now removed.
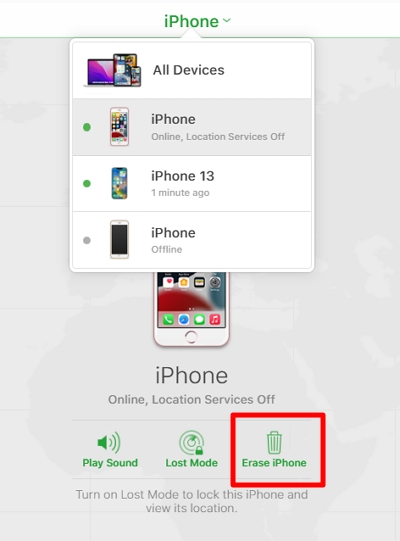
If you know your Apple ID credentials but don't have iTunes or a computer, and Find My is enabled on your locked iPhone, you can unlock the unknown iPhone passcode via iCloud. Although it might sound time-consuming, it's straightforward if you follow these steps:
It isn't, especially if you follow the steps below:
Ensure you remember your passcode. While Face ID or Touch ID is handy, there are situations where your passcode is necessary. Choose a numeric passcode that you can easily recall, or jot it down in a safe place.
If you genuinely forget your passcode and end up entering the wrong one repeatedly, all is not lost. You have up to five attempts to enter your passcode before seeing the "iPhone Unavailable" screen. If you make a mistake, take a moment to breathe and think about what might be going wrong before trying again.
Don't leave your iPhone unattended. Avoid the risk of someone attempting to break in by repeatedly entering the wrong passcode. It's also a good precaution against pranks from friends or foes trying to lock you out.
That's all there is to finding out why your iPhone is asking for a passcode you've never set. The important thing is to determine whether your issue is related to a Screen Time passcode or a screen passcode. The good news is there are ways to quickly unlock your iOS device. Just apply any of the solutions listed in this guide, such as the Unlockit iPhone unlocking tool, to regain access to your device. Alternatively, if all else fails, take your device to an Apple center.


Mako is a technical writer with a passion for all things tech. Whether you're wondering about how to fix your iPhone or Android device or trying to get something to work in your settings, Mako is your go-to for professional help. He loves writing, testing solutions, and most of all, making sure his research is factually accurate.