To facilitate information sharing, many schools and colleges provide students with iPads. However, to ensure these devices are solely used for educational purposes, they often come with an MDM (Mobile Device Management) Profile.
This profile enables the school to monitor iPad usage, maintain data security, and even remotely wipe the device if necessary. While these restrictions serve a purpose, they can limit students' freedom to use the device as they wish, leading some to consider jailbreaking the iPad to bypass these limitations.
In this guide, we'll delve into the necessity of jailbreaking your school iPad and explore methods to bypass the restrictions. For newer iPad models, we'll discuss using MDM bypass tools, while for older models, we'll explore the option of jailbreaking.
Our answer to this question is NO. Even though you can technically remove restrictions on your school iPad through jailbreaking, doing so may not be worth the trouble.
Jailbreaking your device is a complex procedure that requires careful attention to avoid the risk of bricking your device. Additionally, it's important to note that there are currently no jailbreak available for iPad models with the A12 chip or newer running any version of iPadOS 16.x or 17.x, such as the iPad 8th generation or iPad Air 4th generation.
Apple has significantly improved the security of its iOS and iPadOS systems, making it difficult for hackers to develop jailbreak tools since iOS 15. Additionally, jailbreaking your device can make it more vulnerable to hackers and malware.
Before attempting to jailbreak your device to remove restrictions on your iPad, consider using other workarounds such as MDM bypass tools. If you still want to jailbreak your iPad, proceed to the last part.
Another aspect you might be curious about is why school iPads often have restrictions and how these limitations are enforced. Understanding this will make it easier for you to select the right tools to bypass these restrictions.
Schools utilize the Mobile Device Management (MDM) technique, which is enrolled on school iPads to regulate their usage. Through MDM, teachers or the school's IT department can monitor students' activities, view the iPad's screen in real-time, remotely lock the screen, push URLs to students, and even mirror the screen.
However, you may find yourself needing to remove the MDM profile from the school iPad if you have graduated from that learning institution and want to keep the iPad for personal use.
Additionally, removing the MDM profile may be necessary if you purchase a second-hand iPad only to discover that it is managed by a school's profile. The MDM profile could restrict you from using the school iPad normally. This is why many seek ways to remove the restrictions imposed by MDM profiles.
As previously mentioned, jailbreaking your device can bring more trouble than it's worth, especially since there aren't any jailbreaking tools available for the latest devices with A12 chips, such as the iPad Air 4th generation. If you prefer not to jailbreak your device, you can use MDM bypass tools to bypass the MDM restrictions on your school iPad.
Here, we would like to recommend our Unlockit iPhone tool, designed specifically for this purpose. It allows you to bypass MDM profiles or the remote management screen on your iPad with simple clicks, without needing the admin username and password, and without the administrator noticing.
Unlockit is compatible with all popular MDM profiles, regardless of the organization managing the device. Additionally, it supports all iPads and all versions of iPadOS, including the latest iPadOS 17. It's also one of the best tools for removing various other types of locks from the device, including Apple ID, screen lock, and even Screen Time restrictions.
Using Unlockit is very easy. Here's how you can use it to remove the MDM configuration on your iPad:
Step 1: Download and install Unlockit on your computer.
Step 2: Open the program after installation and click on "Bypass MDM Lock" on the main screen.

Step 3: Connect the iPad to the computer using USB cables and ensure that the program detects the connected device. Keep the iPad connected to the computer until the process is complete.

Step 4: In the next screen, click on "Start" to begin removing the MDM profile from the device.

In a few seconds, the program will remove the MDM profile, and you should be able to use your device normally again in just a few minutes.

If your school iPad has older chips like A9, A10, or A11, and you're still considering jailbreaking it to remove the MDM restrictions, we'll walk you through the process using two jailbreaking tools in the next section. But before we get into that, let's begin by preparing your iPad for the jailbreaking procedure.
Follow these steps to prepare your iPad for the jailbreaking process:
Back up your iPad
If you've been using the iPad for a while, there's likely a lot of data on the device that you want to keep. Creating a backup ensures that you can retrieve all your data if something goes wrong during the jailbreak process.
Here's how to back up your iPad via iCloud:
Check Your iPad Model and iOS Version
The method you'll use to jailbreak the device depends on the model of your iPad and the iOS version it's running. It's crucial to determine this before selecting a jailbreaking solution.
Here's how to check your iPad model and iOS version:
Disable Find my iPad
Some jailbreak solutions won't work if Find My iPad is enabled on the device. To be safe, it's best to disable it temporarily. You can always re-enable it later.
Here's how to disable Find my iPad:
Disable Siri
Certain jailbreak solutions may not work if Siri is enabled. You can disable Siri using the following steps:
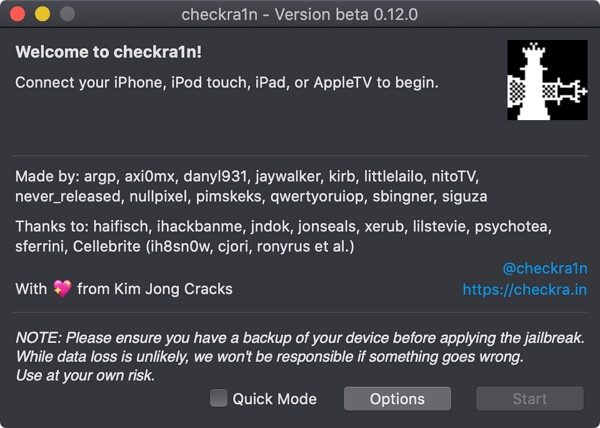
Now that you've prepared your iPad, let's proceed with the jailbreaking process. You have several options for jailbreaking, and one of them is using Checkra1n. Here's how you can jailbreak your iPad using Checkra1n:
Checkra1n is a reliable option that supports devices running iOS 12-14 and continues to add support for newer iPad models. It's compatible with iPad 5th generation, iPad Air 2, iPad mini-4, and iPad Pro 1st generation. Follow these steps to use Checkra1n:
Your iPad will reboot, and if all goes well, it should be successfully jailbroken.
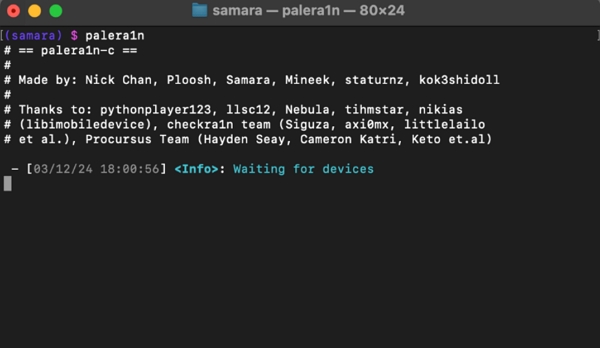
Palera1n is a jailbreaking solution known for its reliability. It officially supports devices equipped with A9-A11 chips running iOS & iPadOS 15.0-16.x, such as the iPad (7th, 6th, or 5th generation). If you're ready to jailbreak your school iPad using Palera1n on your macOS computer, follow these steps:
When it is complete, the iPad will restart and the jailbreak will be done.
In conclusion, jailbreaking a school iPad can be a complex process, especially considering the limitations posed by newer iPad models with advanced chips. However, for those with older iPad models and a desire to bypass MDM restrictions, jailbreaking remains an option.
Yet, for individuals who prefer not to jailbreak their devices, Unlockit iPhone will be your ideal workaround. With its user-friendly interface and ability to bypass MDM profiles effortlessly, Unlockit iPhone provides a reliable solution for removing restrictions on school iPads without the need for jailbreaking.
Whether faced with the limitations of newer iPad models or a reluctance to engage in jailbreaking, Unlockit iPhone offers a safe and effective alternative to regain control of your school iPad.


Mako is a technical writer with a passion for all things tech. Whether you're wondering about how to fix your iPhone or Android device or trying to get something to work in your settings, Mako is your go-to for professional help. He loves writing, testing solutions, and most of all, making sure his research is factually accurate.