When you check your iPad Storage, you'll see a bar at the top that's divided into different categories like Apps, Media, Photos, and Mail.
There's also a category called Other/System Data, which might take up a significant amount of space. Usually, System Data falls in the 5GB to 20GB range, but if it's more than 20GB, it might be too much.
In this guide, we will explain what system data on your iPad is and list several troubleshooting tips if the System Data on your iPad is huge.
Let's get right to it!
Your iPad's "System Data" is quite diverse and large because it holds various things, which includes:
While your iPad is designed to handle these data, caches and logs and prevent the storage on your iPad from becoming too full, it doesn't always do this perfectly. If you encounter the iPad system data huge problem, continue reading to explore solutions to address the issue on your iPad.

Image source: reddit
If you've just reset your iPhone or logged into iCloud, we recommend waiting an extra 48 hours. This gives your iPad time to go through all the files, removing the ones it doesn't need anymore. Make sure your device is connected to Wi-Fi and plugged in whenever you can during this period.
What's more, it's advisable to restart your iPad as it helps refresh the system and often resolves minor issues, especially if you observe any sluggishness or unusual behavior in your device's performance.

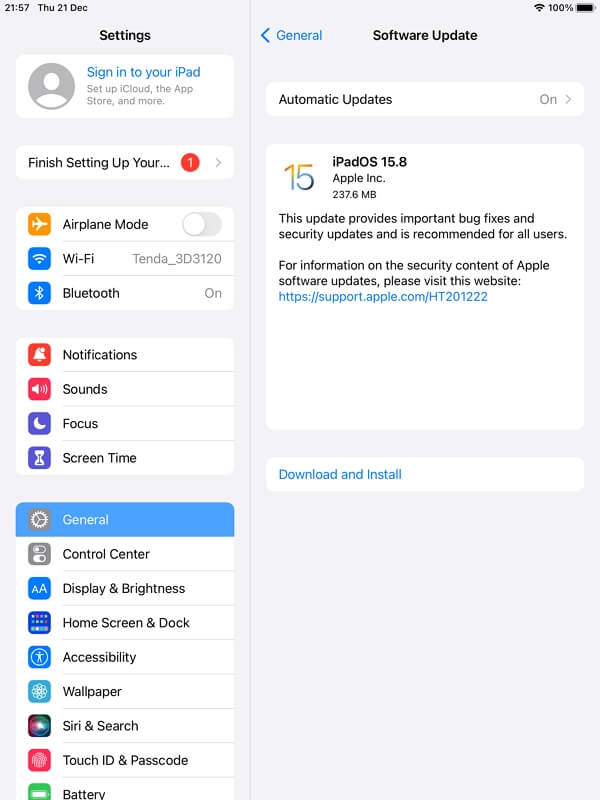
If the system data on your iPad is still huge, make sure your iPadOS is up to date:
For more details, you can check the Update your iPhone or iPad - Apple Support page.
Avoid installing new apps or downloading/streaming music or videos until the iPhone update is complete.
If the above mentioned tips and tricks don't work, here are some ways to reduce system data usage on your iPad:
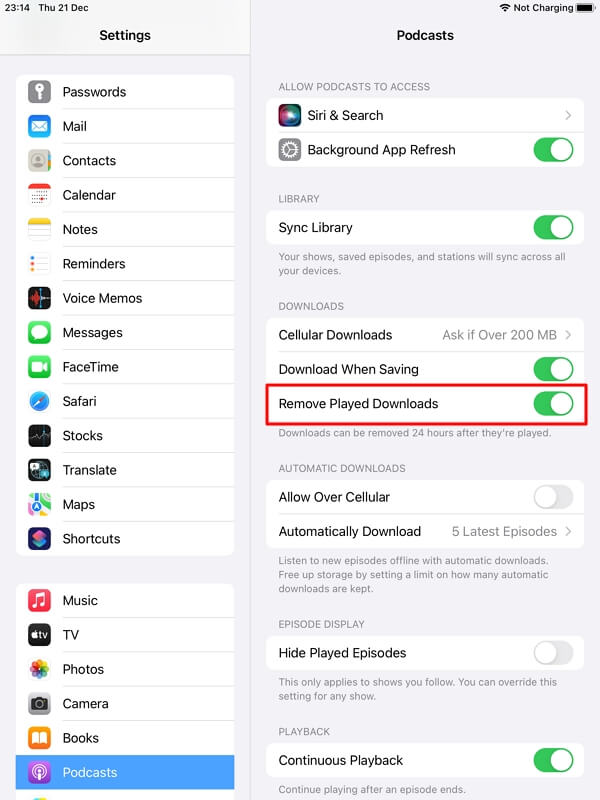
It's a good idea to clean up the cache of your TV, Mail, Music, Podcasts app, or other apps every now and then. If you don't, the stored data can pile up and cause issues like crashing, freezing, and your device running slow. It might even use up more battery than usual.
For example, to delete downloaded podcasts after you listen to them, go to Settings, tap on Podcasts, and then choose to turn on 'Remove Played Downloads.'
Luckily, some apps have a built-in option to clear this stored data, called the cache. Just go to the app's settings to find it.
But some apps on iPhones or iPads don't make it so easy. For those, you have two options: you can either "offload" the app or delete it entirely. Offloading removes the app but keeps its important files and data.
Starting from iPadOS 16, unused apps can be offloaded automatically if you turn on the option. To do this, go to Settings -> General -> iPhone Storage, and then turn on Offload Unused Apps.

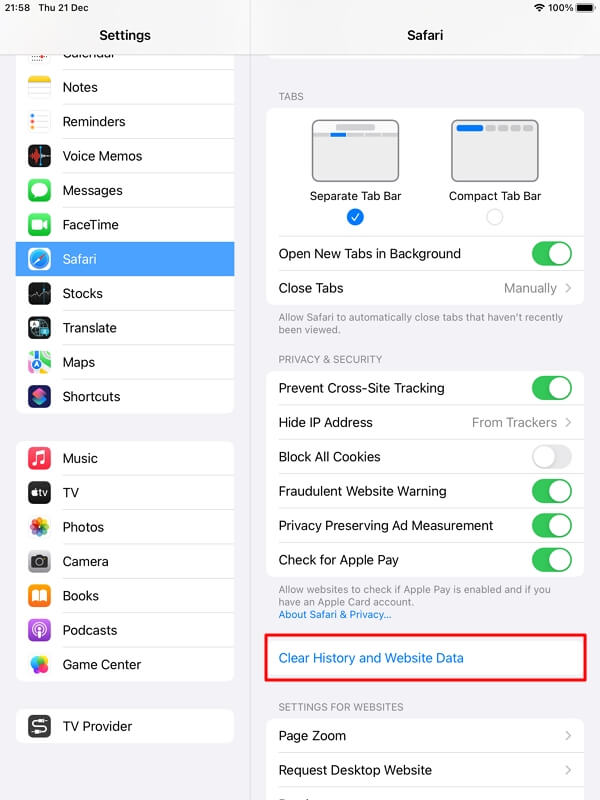
To make sure your device doesn't use up too much storage with unnecessary System Data, it's a good idea to regularly clean up your browsing history and website data. Even though saving your history is handy for quickly getting to your favorite sites and saving time, it's best not to hang onto it for too long.
I personally like to tidy up my browsing history every now and then. This not only keeps my browser looking nice and organized but also makes sure my privacy stays protected. Plus, it's an important step in keeping the browser working smoothly.
Clearing your browsing history for well-known web browsers like Safari, Chrome, and Firefox is pretty straightforward. Let me walk you through it:
To clear Safari Browsing History:
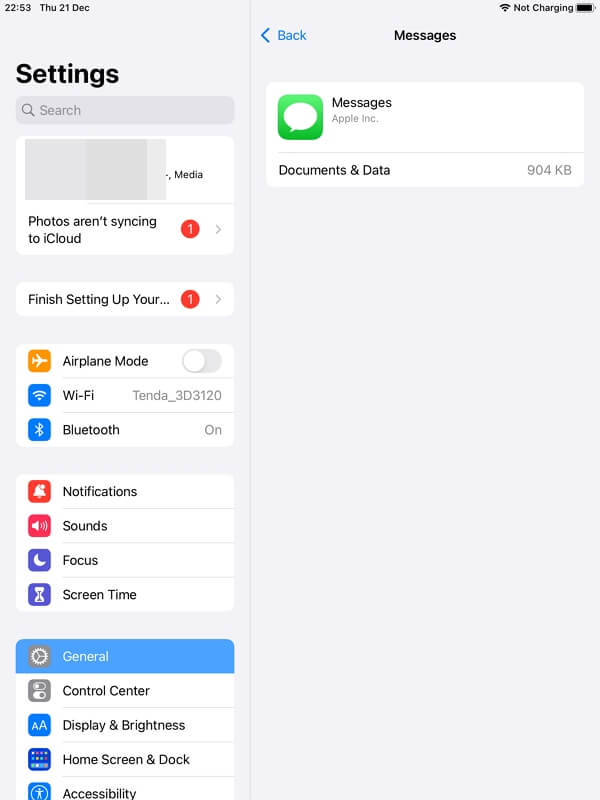
It's a good habit to delete message attachments that you no longer need to make sure they don't take up unnecessary space on your iPhone or iPad. Apple's Message app makes it easy to manage and remove message attachments. Here's a simple guide on what to do:
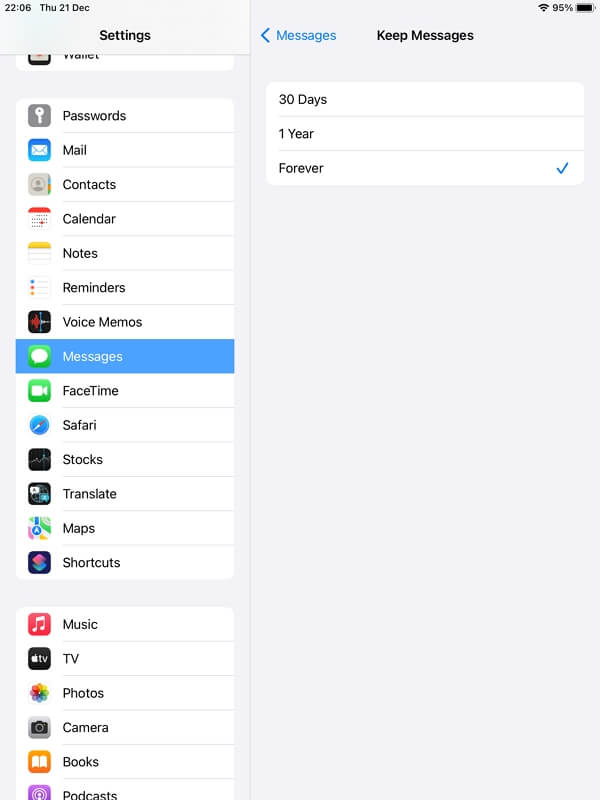
4. In addition to clearing out unnecessary message attachments, you can also decide to delete the history of your text messages every now and then to keep your iPad's storage in check. Here's a simple way to do it:
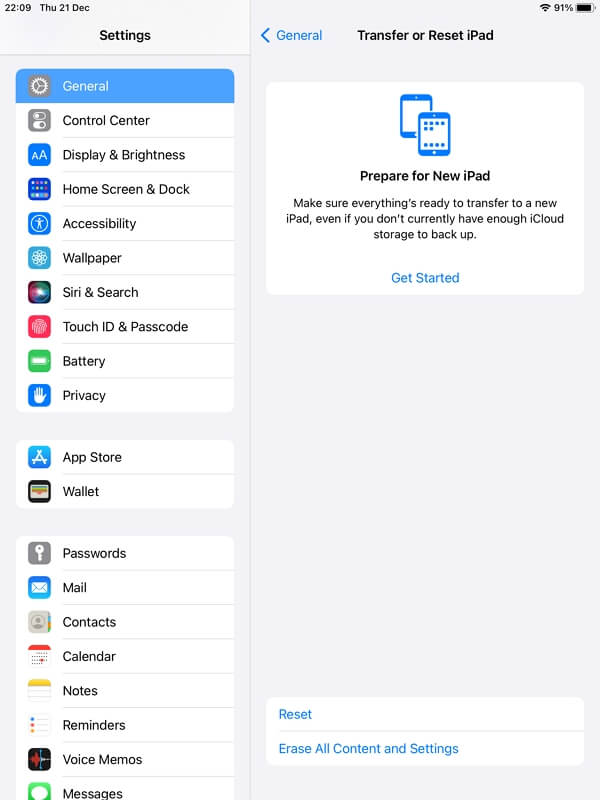
If the steps I mentioned earlier didn't really do the trick, I'd suggest considering a fresh start for your device. It's a significant move to wipe out the System Data on your iPhone or iPad, but it's worth it, especially when you want a clean slate.
However, before you go for it, make sure to back up your device using iCloud or iTunes. Once that's done, follow these simple steps:
Alternatively, you can use iTunes to restore your device. Connect your iPhone to a computer, launch iTunes (macOS Mojave or earlier or Windows)/Finder (macOS Catalina or later), select your device, and then click "Restore iPhone/iPad." Follow the prompts to complete the process.
That's all there was to it. Using these tips and tricks, you can always clear out space on your iPad, even if the system data is huge. This means there will be more room for your apps and saved data! Just make sure to follow the instructions thoroughly!

